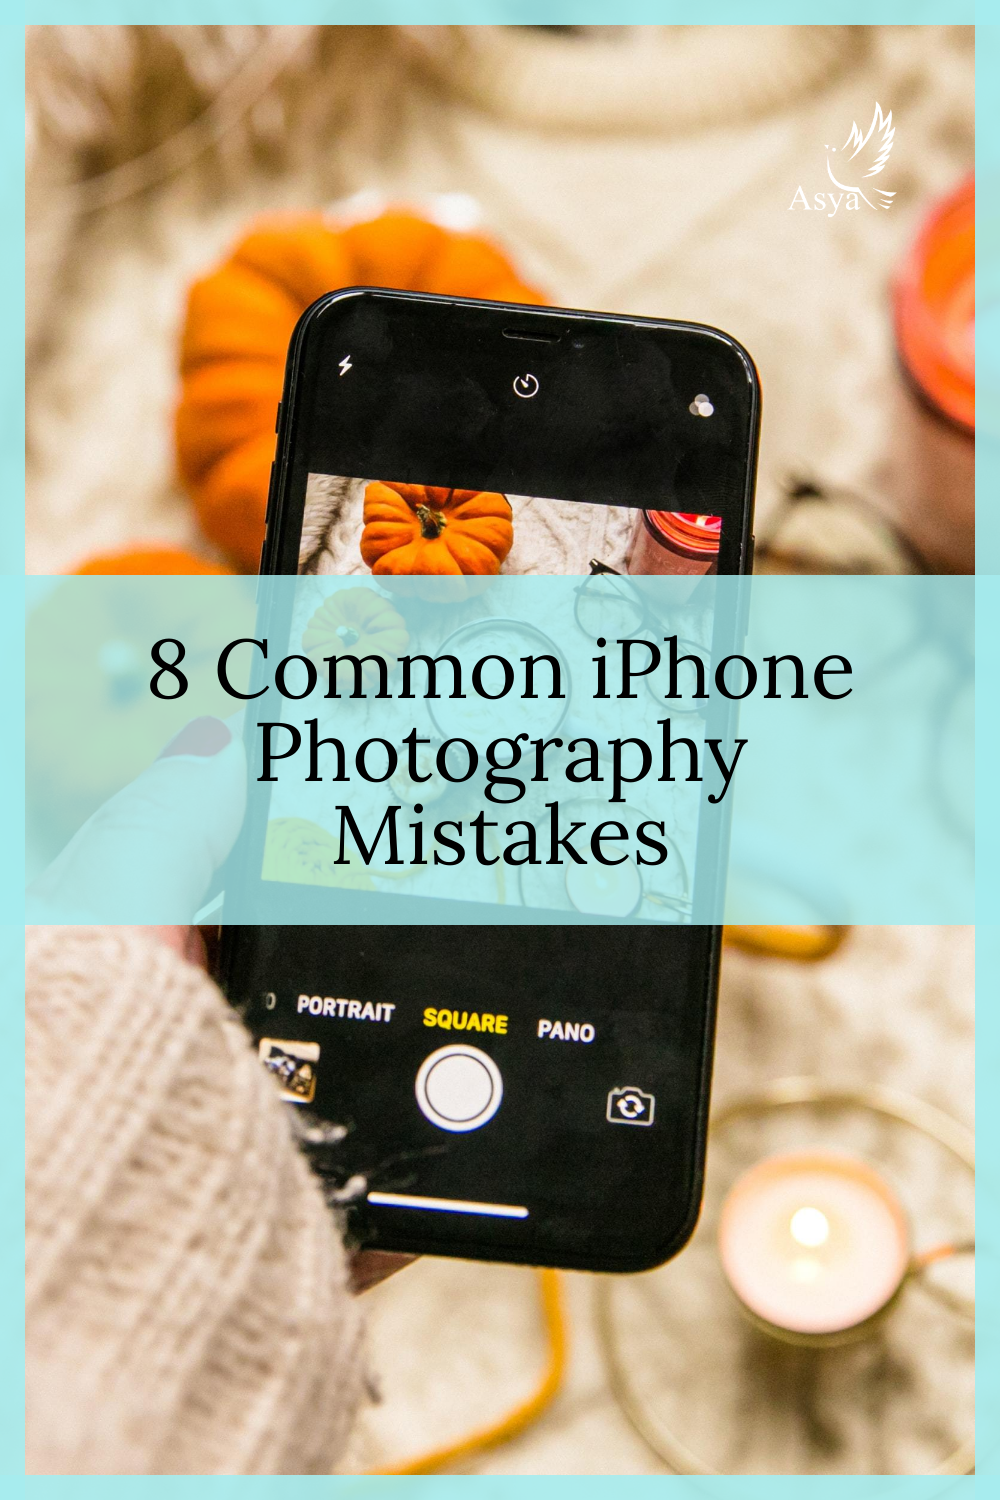
8 Common iPhone Photography Mistakes

Have you ever wondered why other people take great photos & how they learned? I can tell you that no one is perfect when they first start anything.
Making mistakes is how we learn. We should not be scared of making them but instead, we need to be open-minded to acknowledge them & learn from our own & other people’s mistakes.
The smartest way is to learn from an expert, someone who has gone through it already that can teach you and save you the time of learning on your own.
I’ve made all these mistakes many times & had a lot of learning years to get to this point. I hope this post will save you the pain of making these mistakes on your own so that you can start taking better photos today as a business owner & content creator.
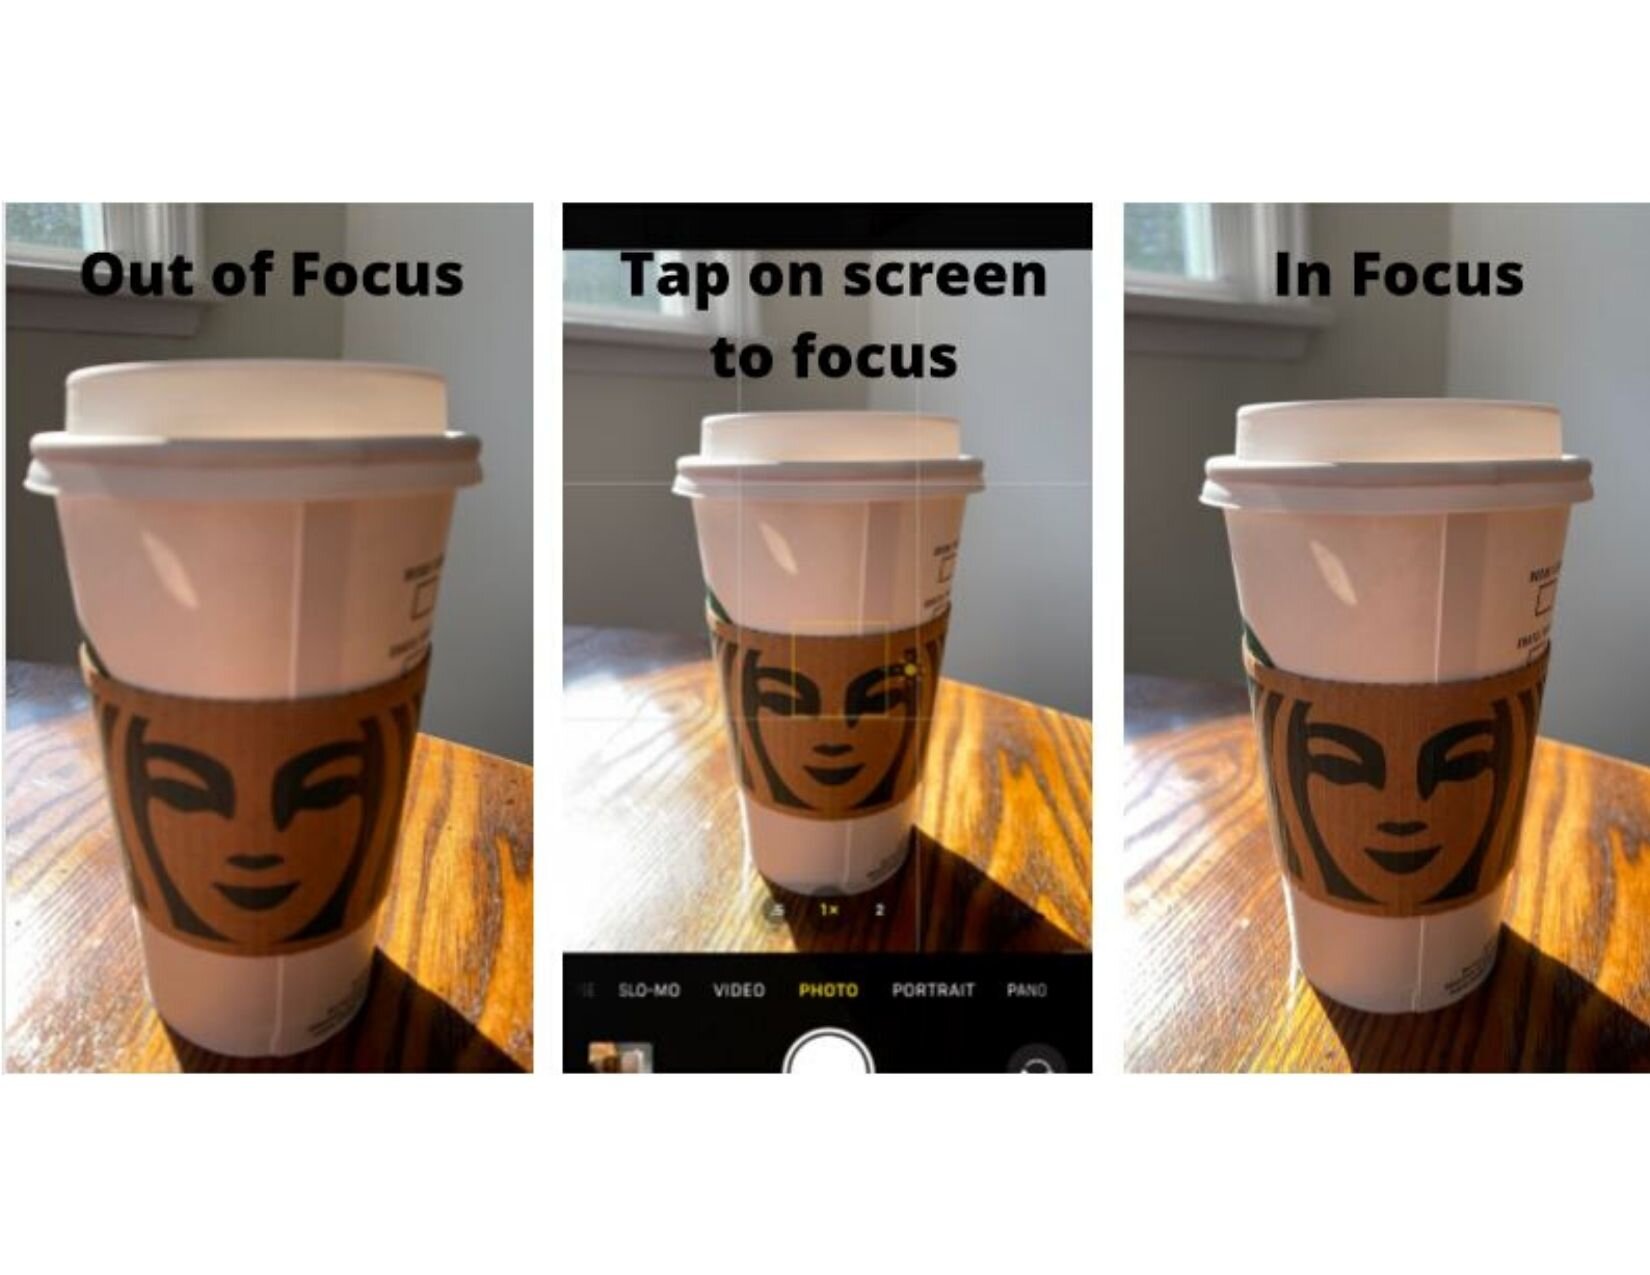
1. Subject Is Not In Focus
Having a subject in a photo makes it more interesting and gives the viewer something to focus on. However, if that subject is blurry & out of focus you will lose the attention of your audience.
This can happen mostly if you’re taking a photo in low lighting (low exposure) using your iPhone. The shutter of the phone has to stay open longer to let in more light so if you take the photo & move your hands right away, that photo will not turn out.
The other reason this could be happening is because you may be allowing the iPhone to auto focus instead of you setting the focus manually. To set the focus manually just tap your screen on the subject.
If you tap and hold on the subject on your screen, it will lock the focus. I don’t like using that feature because if the subject or you moves, then you have to readjust the focus.
2. Using Zoom
No matter what they say, when you zoom on an iPhone or Smartphone, it always looks blurry and can make you look like an amateur. Instead of using zoom, get closer to your subject.

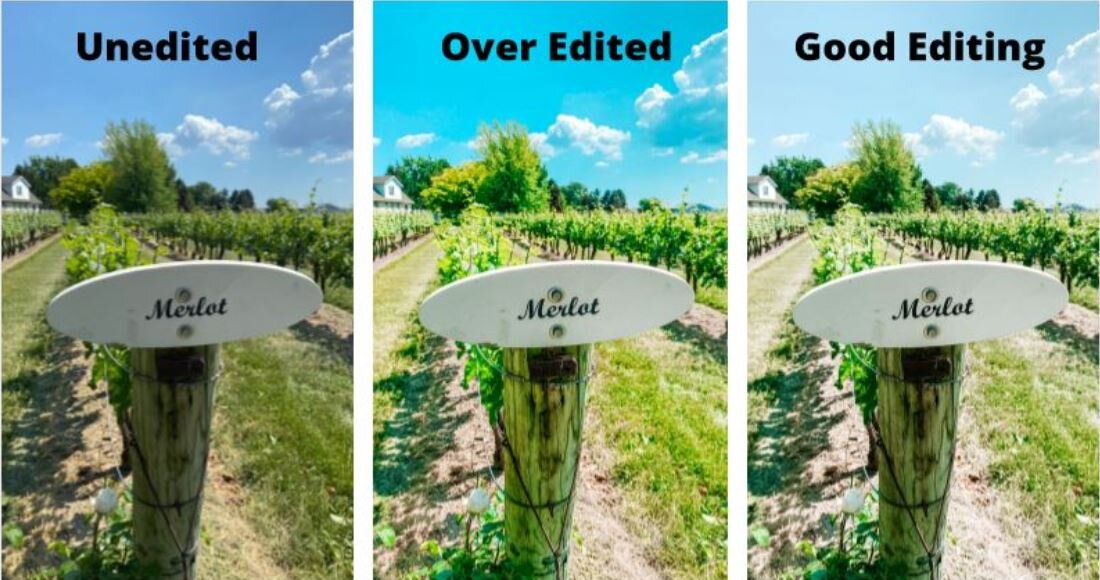
3. Overediting
Editing is a very important part of photography, but overediting will ruin your photos. When the colours are too saturated your photo looks fake & unappealing. It makes you lose credibility & you lose the interest of your audience.
Do you see the difference in the images below?
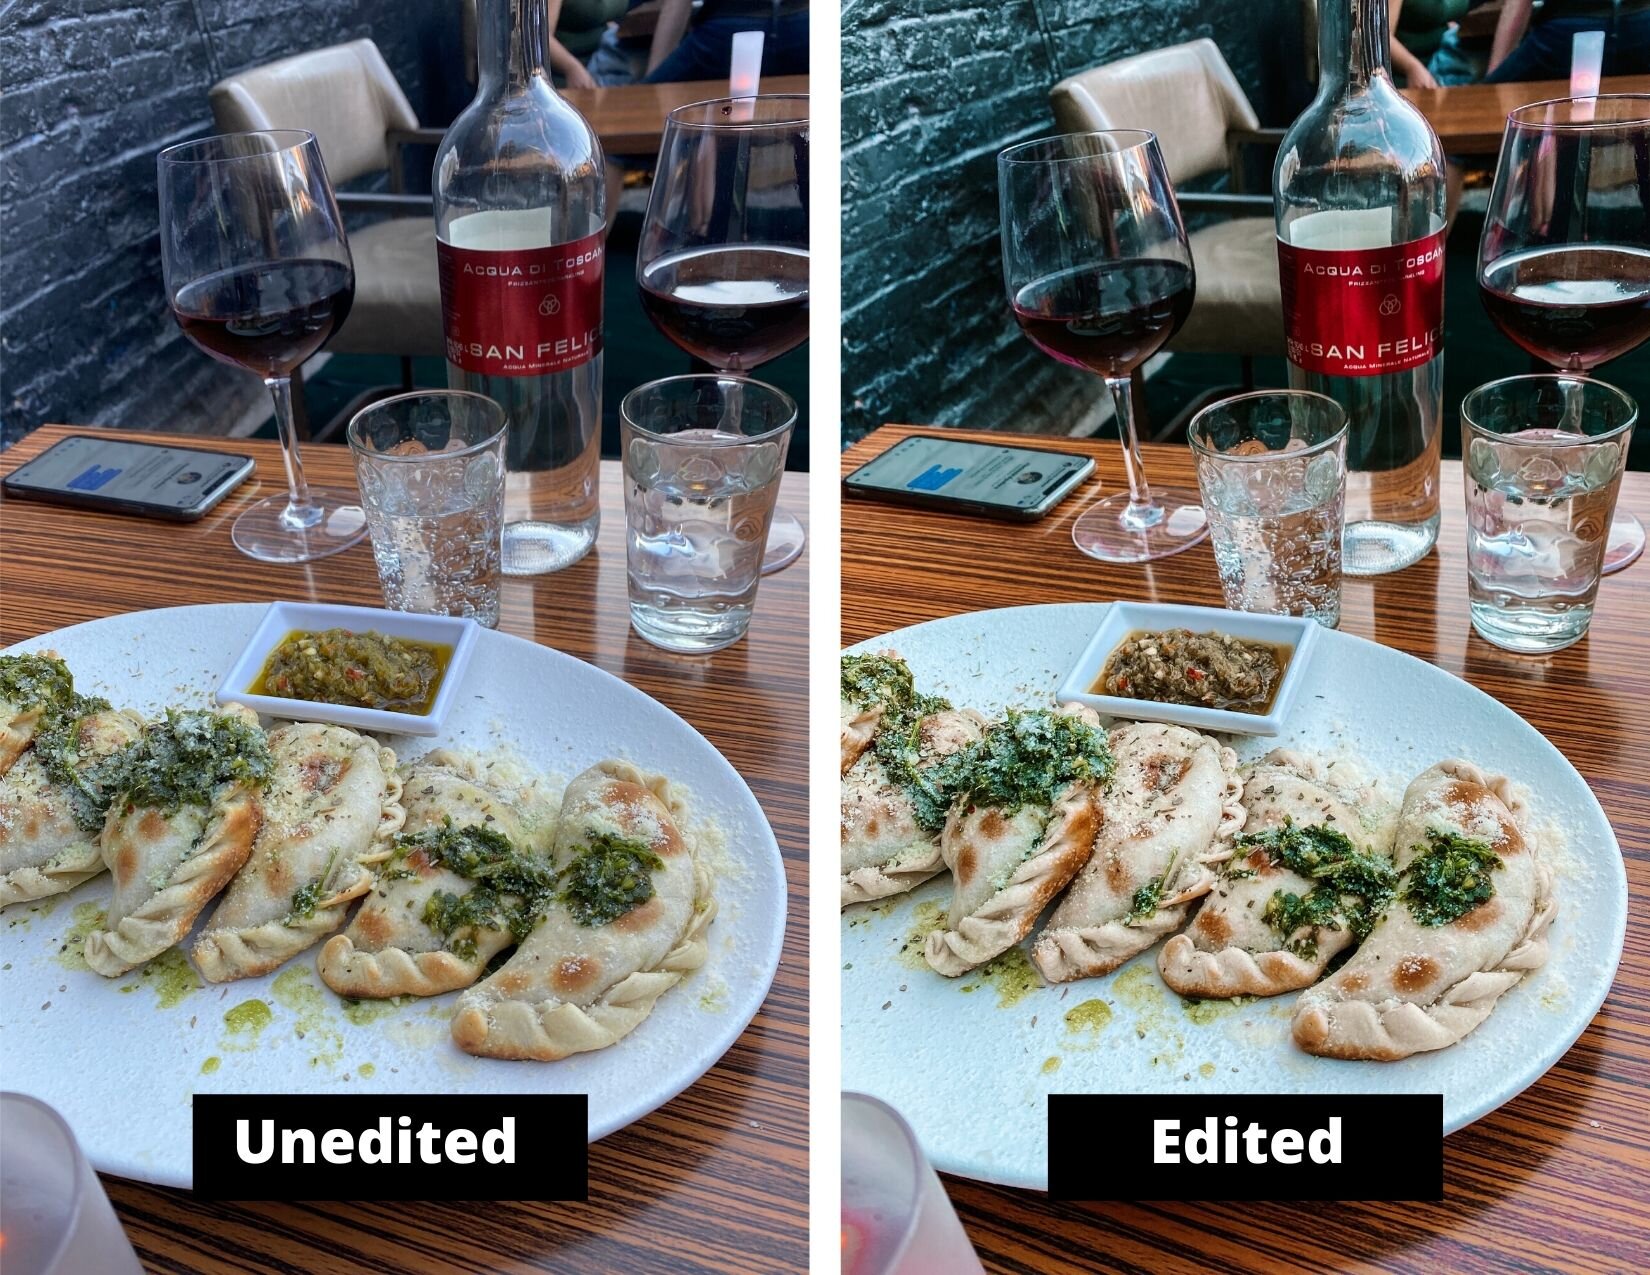
4. No Editing
I don’t know what’s worse, not editing your photos or overediting. If you want your photos to compare to a pro & be high quality, then you have to edit your photos. This is like the icing on the cake. It brings out your unique style & helps you to be more creative.
There are so many free apps you can download and edit directly on your phone. If you want to know what apps I use & recommend, click here.
A great photo will be even greater after editing. Do you see how much of a difference editing makes?
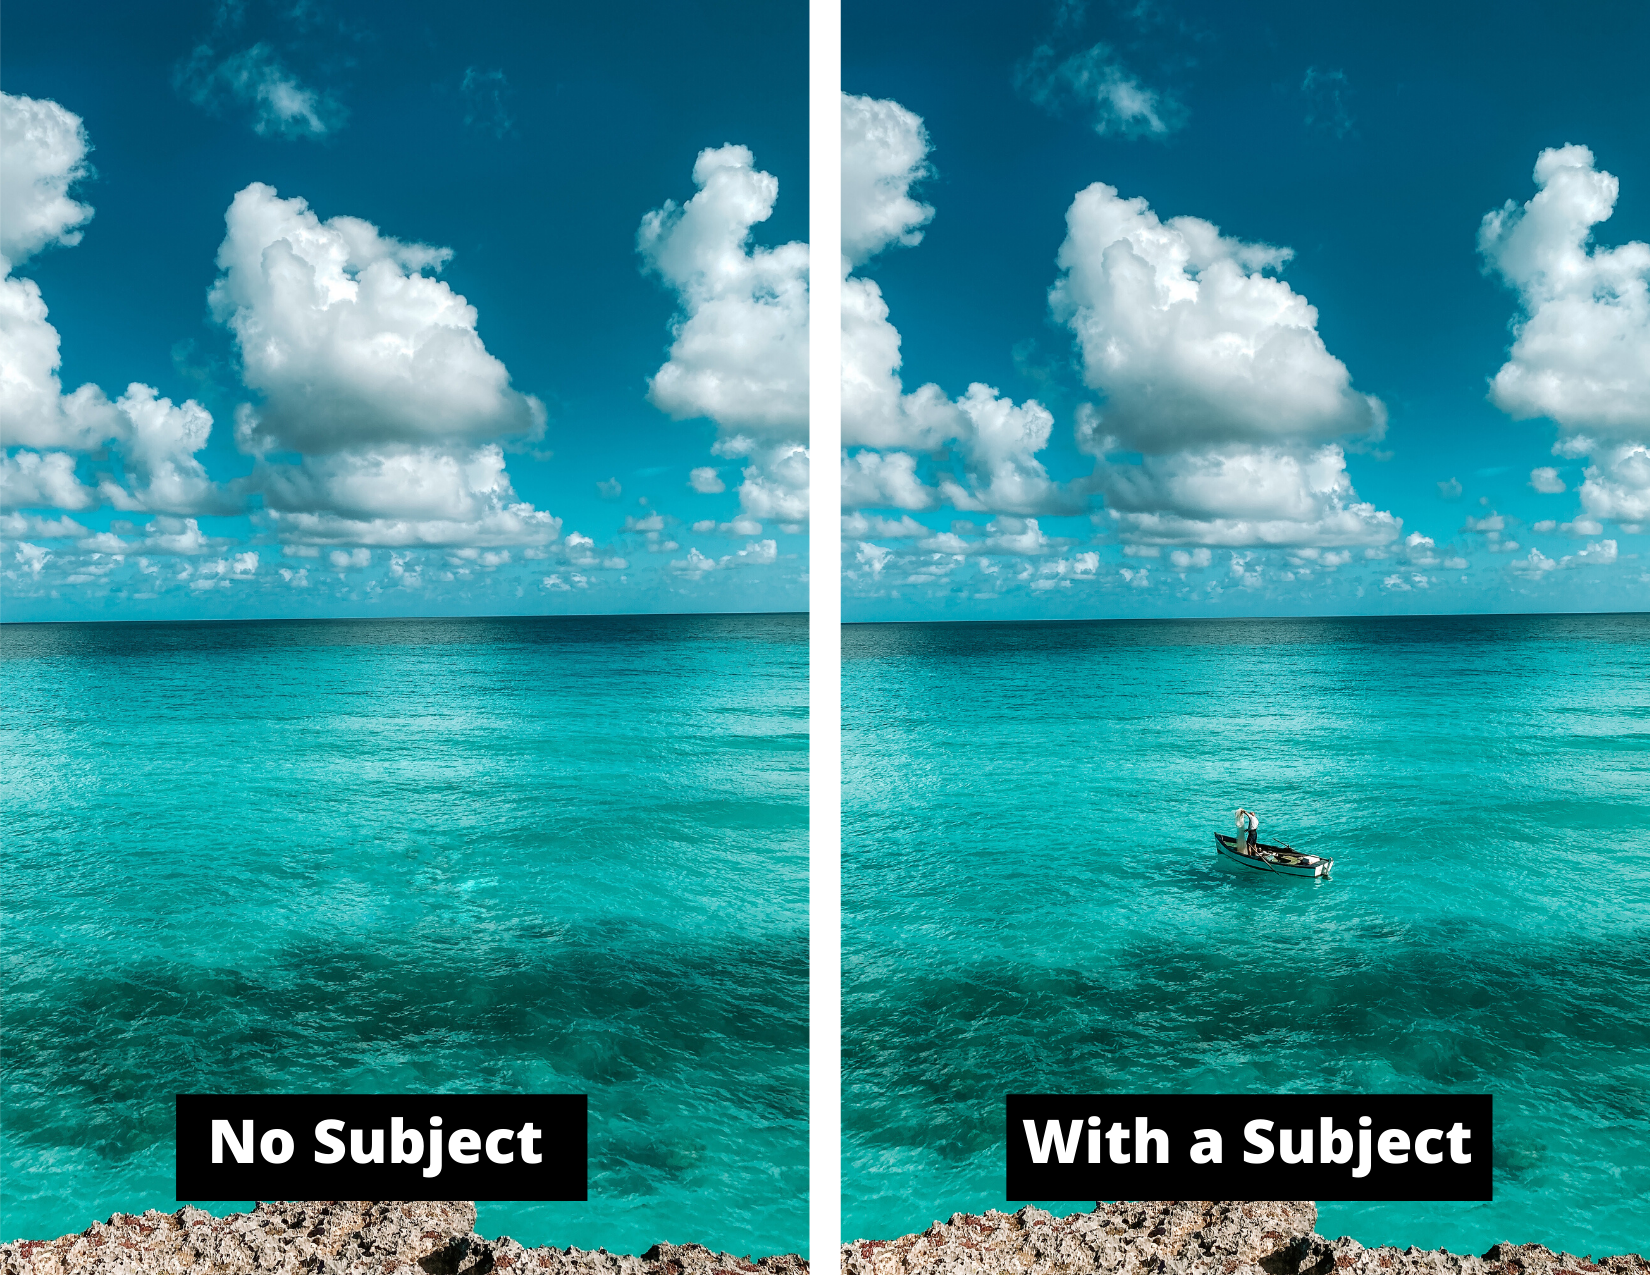
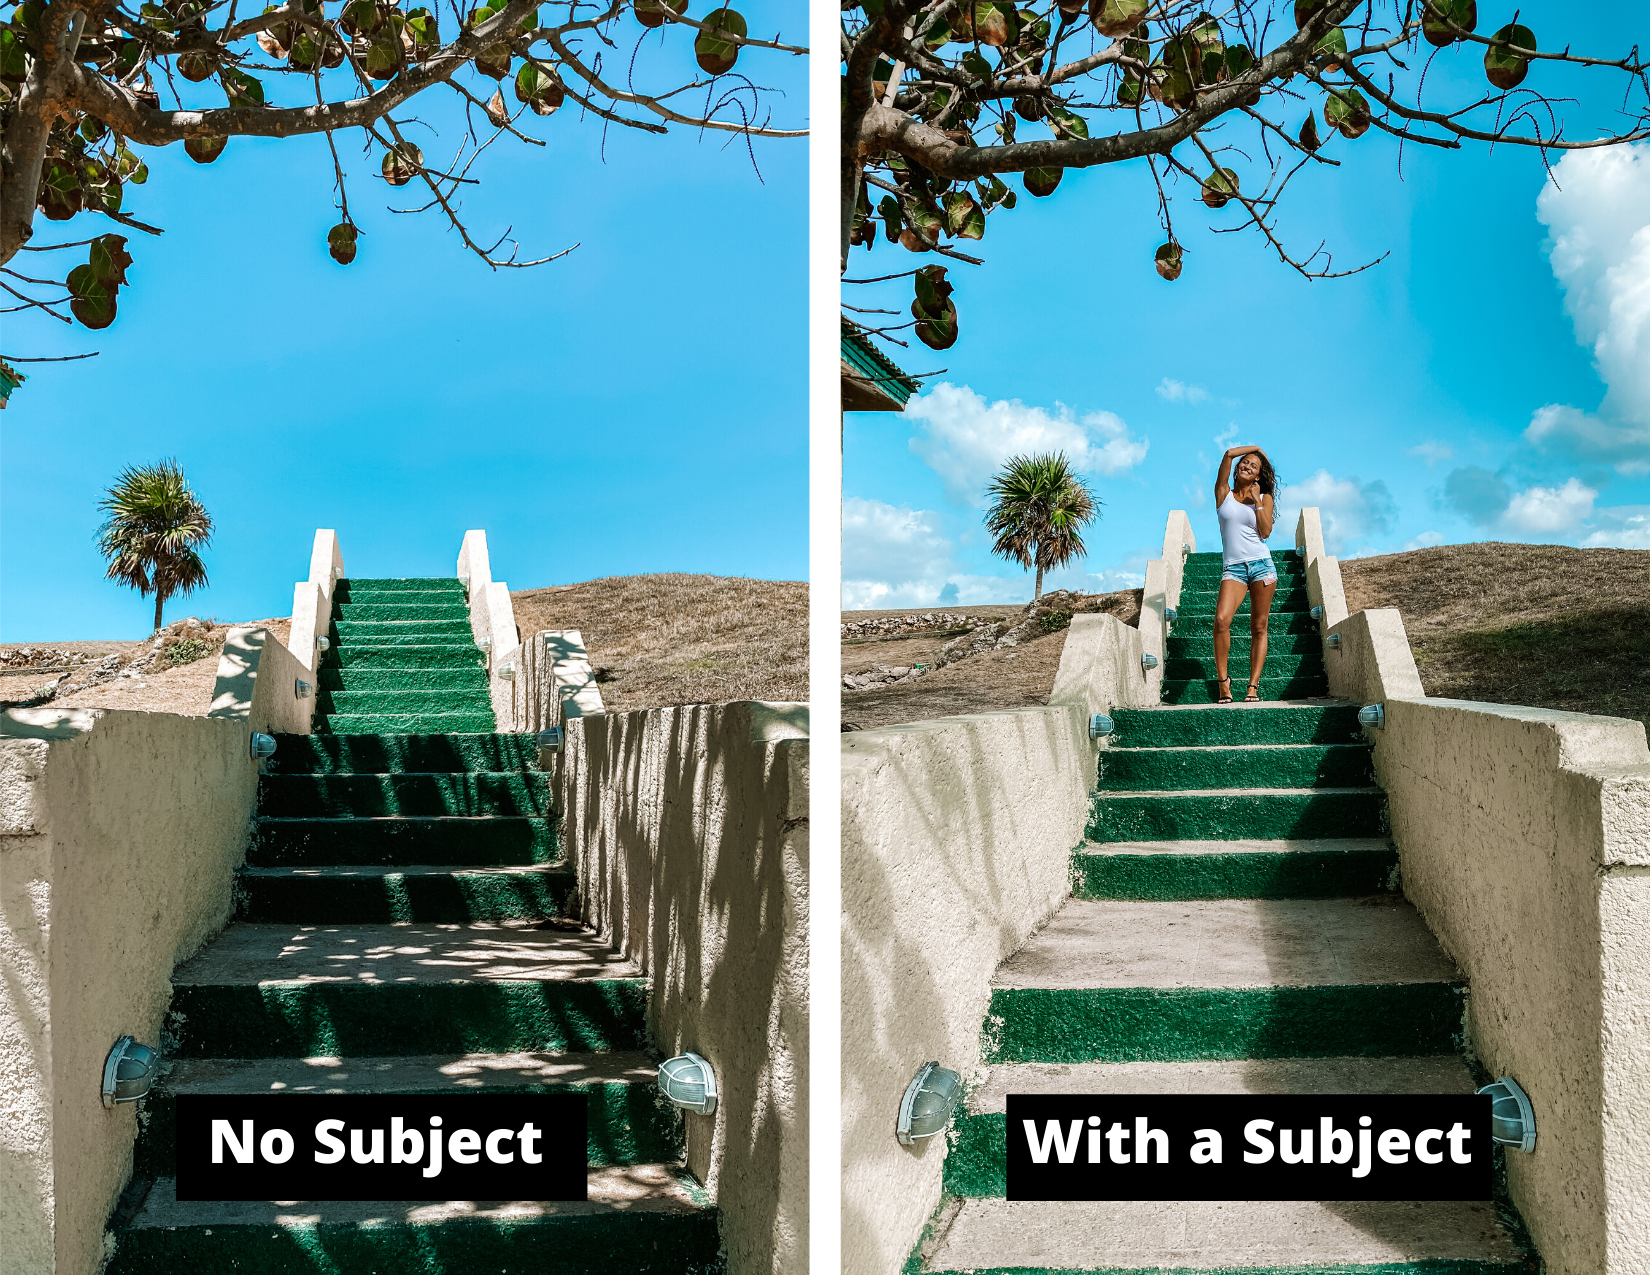
5. No Subject
Photos with no subject can be dull. Having a subject in your photo makes it more interesting, even if you’re taking landscape or city photos. A subject can be anything, a rock, a tree, a house, an animal or a person. You can also find subjects in landscape or city photos.
Composition has a major part to play in how you organize a subject to make it interesting and direct your viewer’s eye.
This is something you will learn more about in my 1:1 Travel iPhone Photography Coaching program.
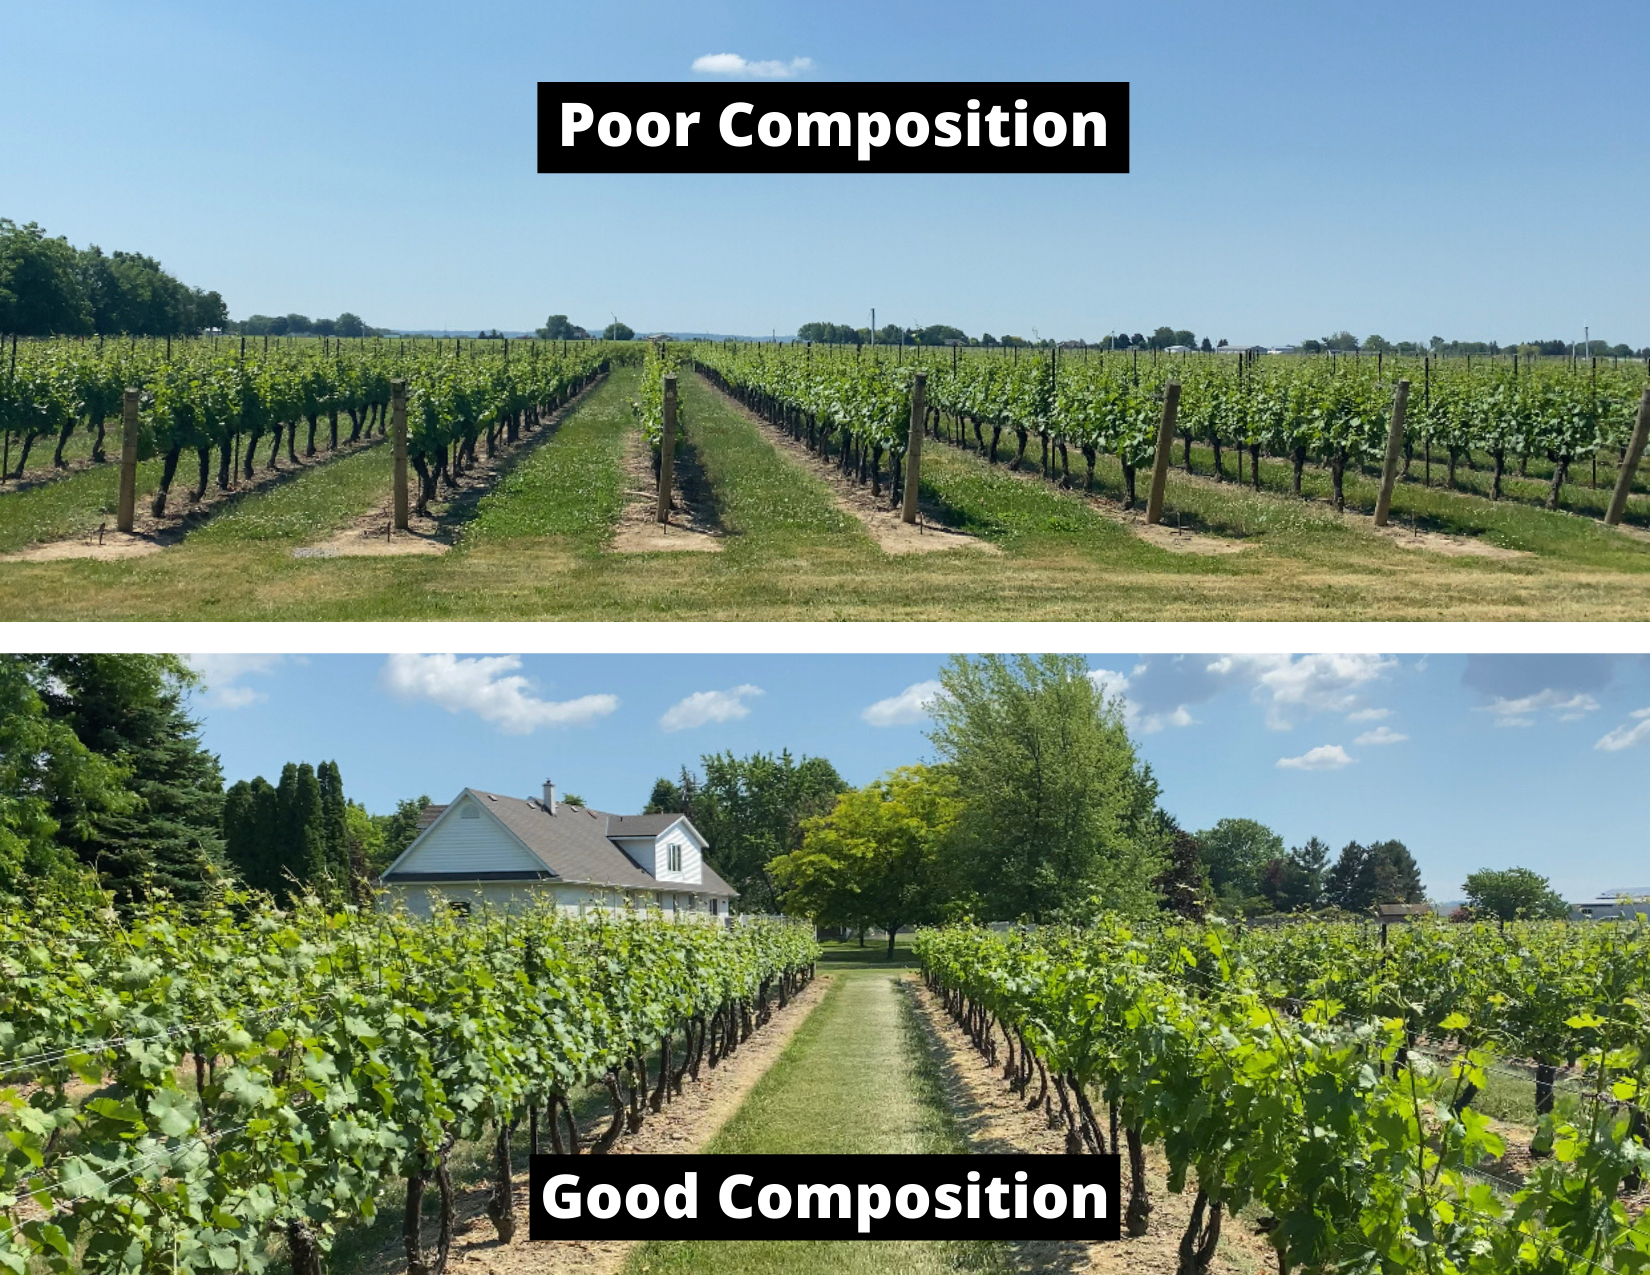
6. Poor Composition
Poor composition can make or break a good photo. Composition means how the things in your photo are arranged to make it interesting & tell a story. You use composition to direct your viewer on what you want them to focus on.
The best way is to think about and plan how to take the photo. Be strategic, don’t just snap aimlessly. Take the same photo in different ways, change the angle, the layout, look for interesting patterns or colours.
7. Bad Lighting
The position of the light source is very important especially on an iPhone. If you’re taking a photo of a person, make sure the light is not behind them because that will create a silhouette & you won’t be able to see the person clearly.
When shooting on your iPhone you must learn what type of photos can be taken, what time and where.
For example, if you’re taking a photo of a person after the sun sets or at night with minimal fluorescent light, the photo will not turn out good. It will be blurry & pixelated even if you use the newest iPhone. But at night you can take beautiful photos of city lights.
Be mindful of the lighting based on what you’re taking a photo of. Some rules are meant to be broken but first you must learn the rules & learn which ones you can break.

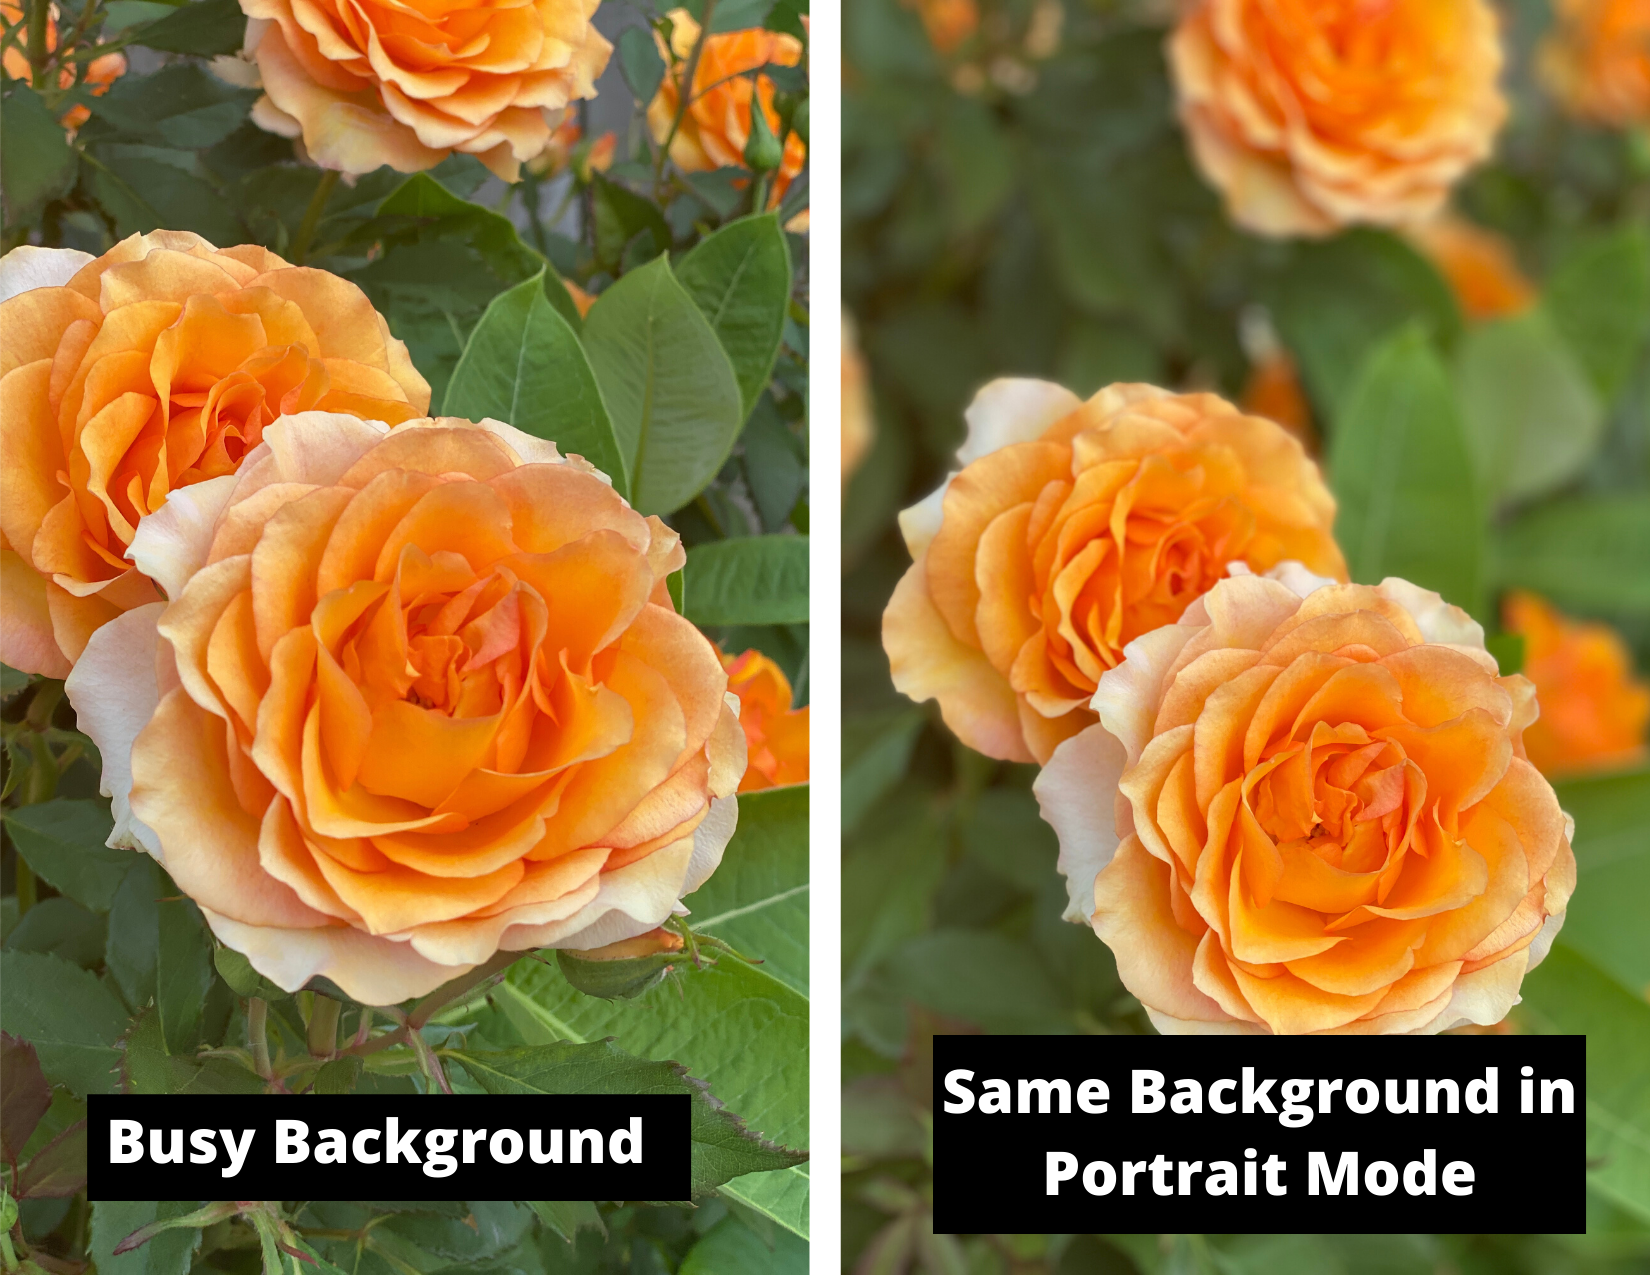
8. Busy Background
If your background is too cluttered or busy you will lose the attention of your audience because it’s very distracting. If you’re taking a photo of a person and the background is very busy & distracting, try taking it in portrait mode or blurring the background in editing.
Again you must be strategic in how you compose the photo & don’t be afraid of experimenting.
Social Media, especially Instagram is very visual and your photo is what will stop someone scrolling before they can read your caption so you want to make sure your photos stop the scroll.
Have you made any of these mistakes? Which of these do you struggle with the most?
If you want to learn more & are serious about using your iPhone to create great content for your brand or business then check out my 1:1 iPhone Photography Coaching Program where you can be coached by myself 1 on 1 on your photography!
Pin This Post For Later!