14 iPhone Photography Tips for Beginners - Understanding Photography Foundations

The photography game has evolved. Whether you’re taking photos for your blog, as an influencer, new business owner or creative, we all have a smartphone and if you’re like me you have an iPhone. It's no surprise that the iPhone has become so popular in the photography game. It’s always on you in your pocket or purse and readily available to easily use to capture a moment.
Even some of the most professional photographers will take photos with their iPhone sometimes, because that's the camera they had available when they see an opportunity to capture a moment. Carrying around a DSLR isn’t always convenient and most of us don’t have a photographer following us around to take photos of us constantly.
In the beginning of starting your business or side hustle/blog you don’t have the budget to hire a photographer or buy your own DSLR then figure out how to use it, but you probably have an iPhone already. I will teach you in this post the foundations of iPhone photography so that you can use these tips to take amazing photos on your iPhone for your business, blog and influencer marketing.
If you use and apply my tips, you will be able to take great professional photos for your business, Social Media and blog.
1) Clean your lens!
Don’t forget to clean your lens with a soft cloth or soft material because you may have touched the lens and gotten finger prints on it.

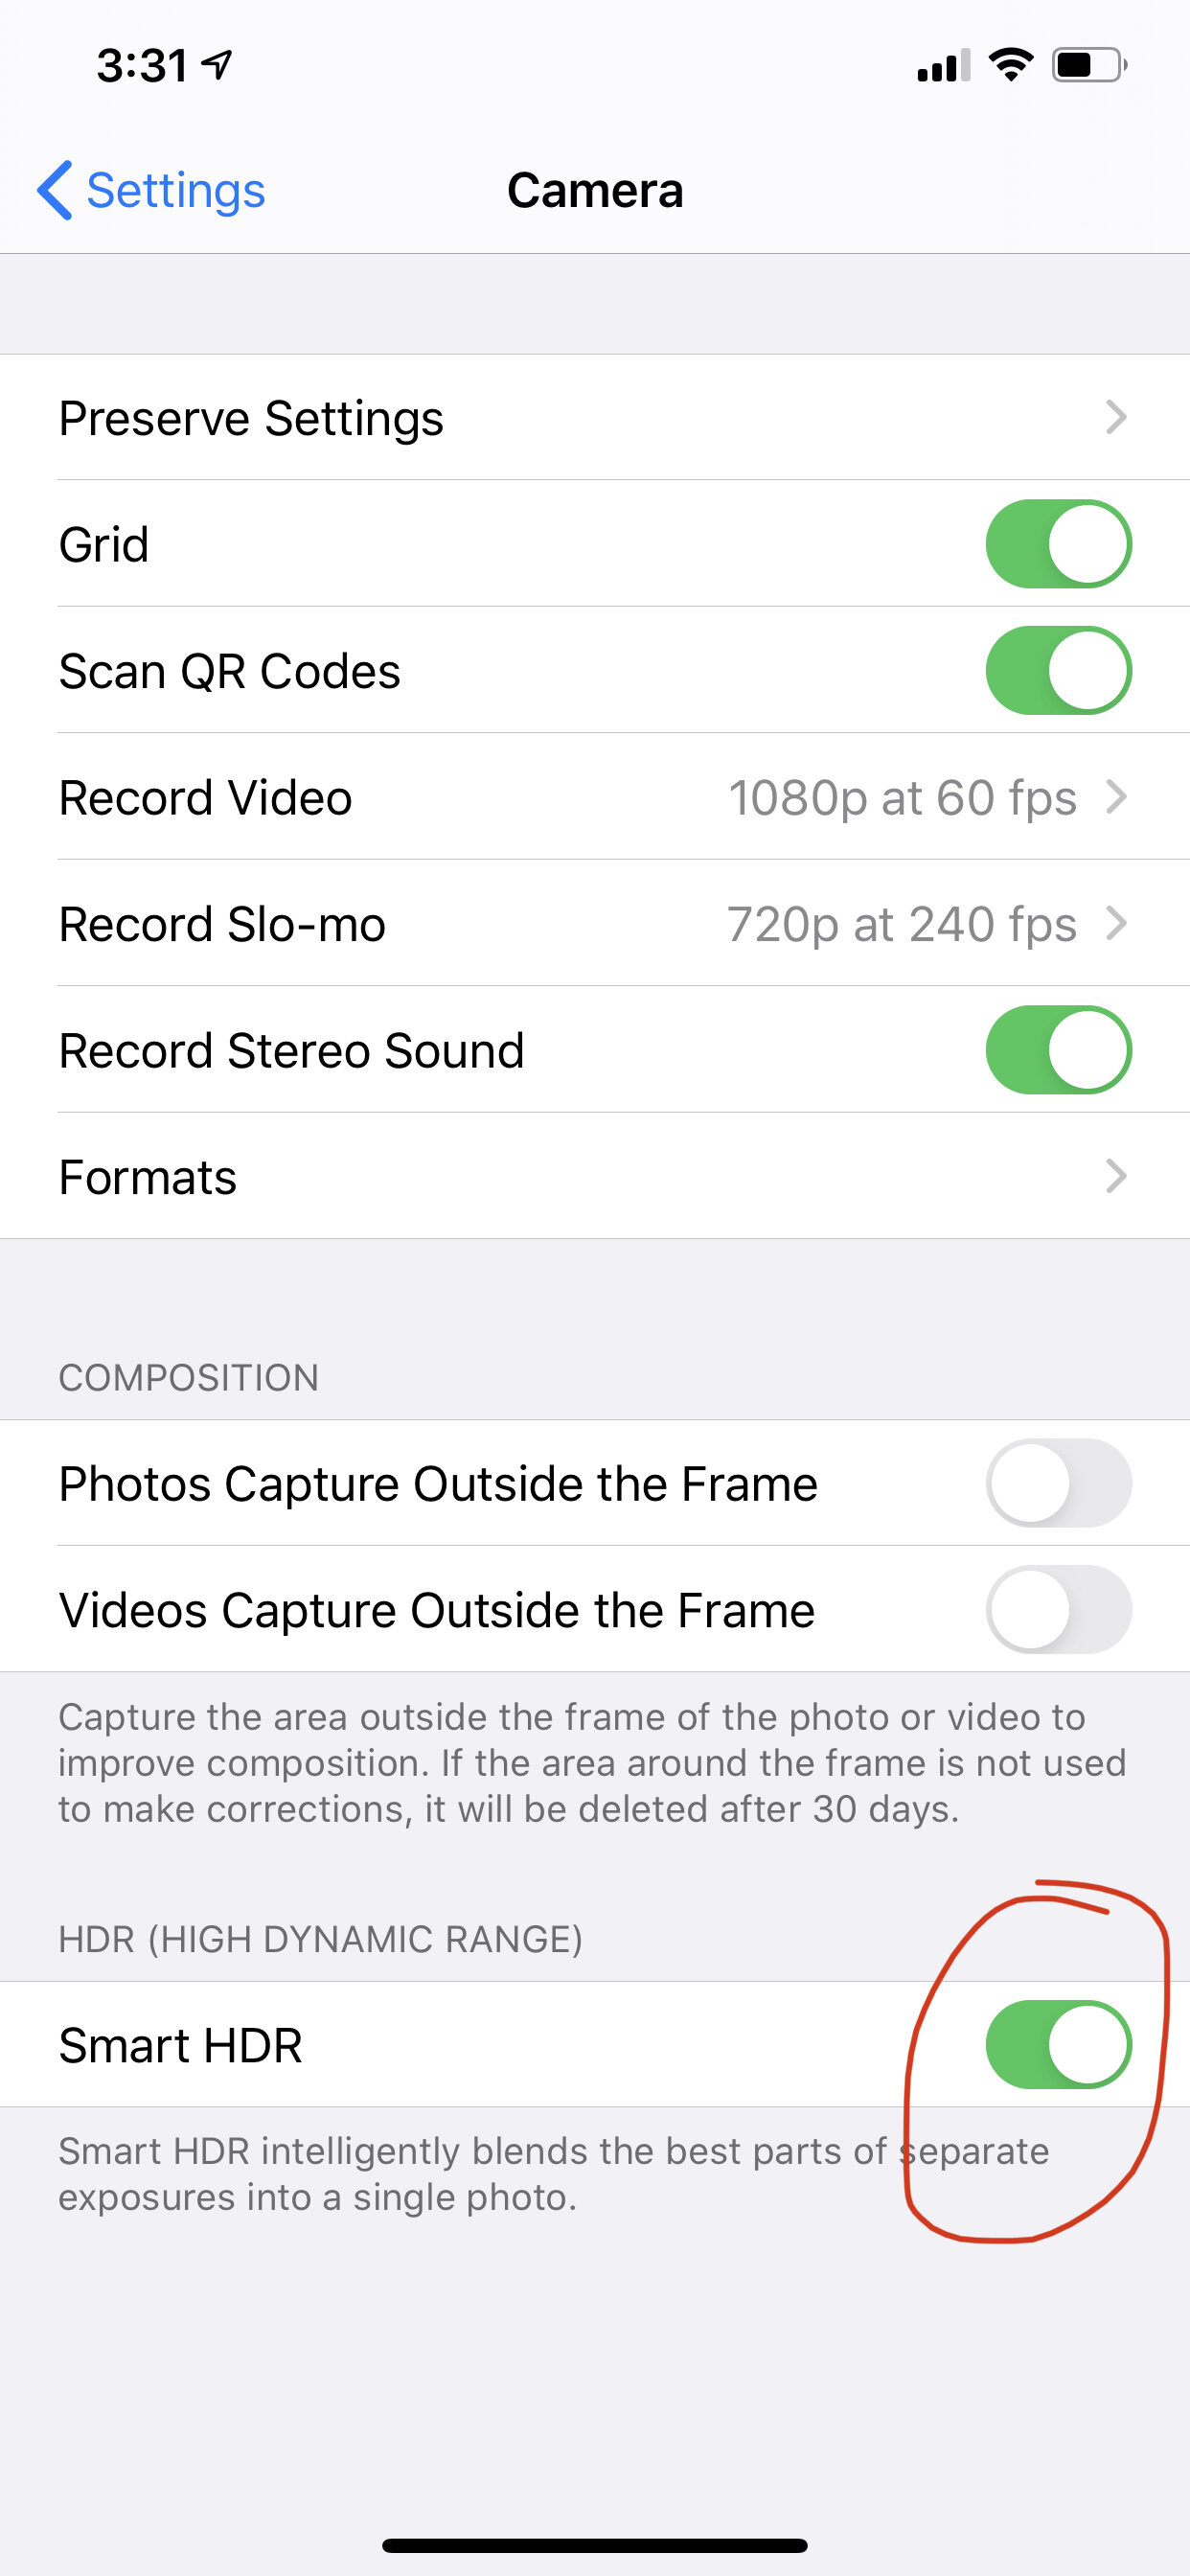
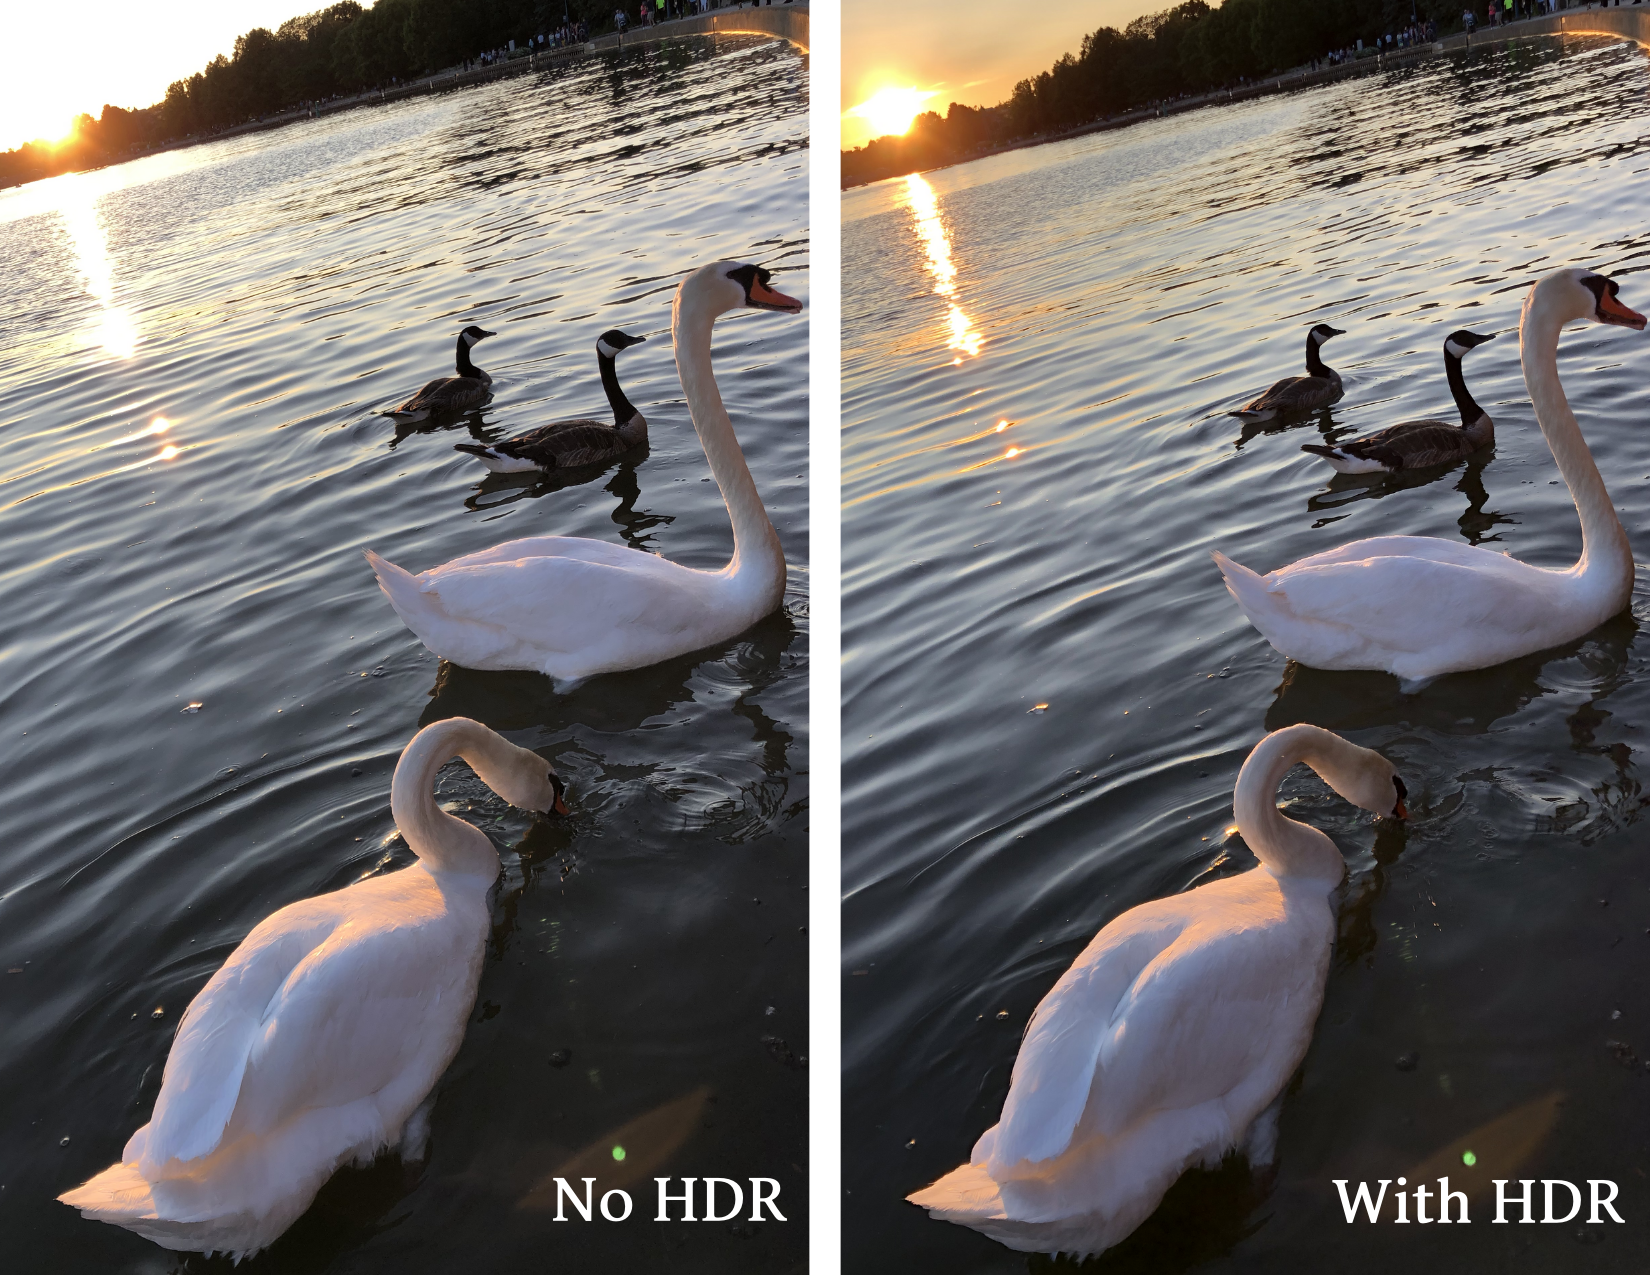
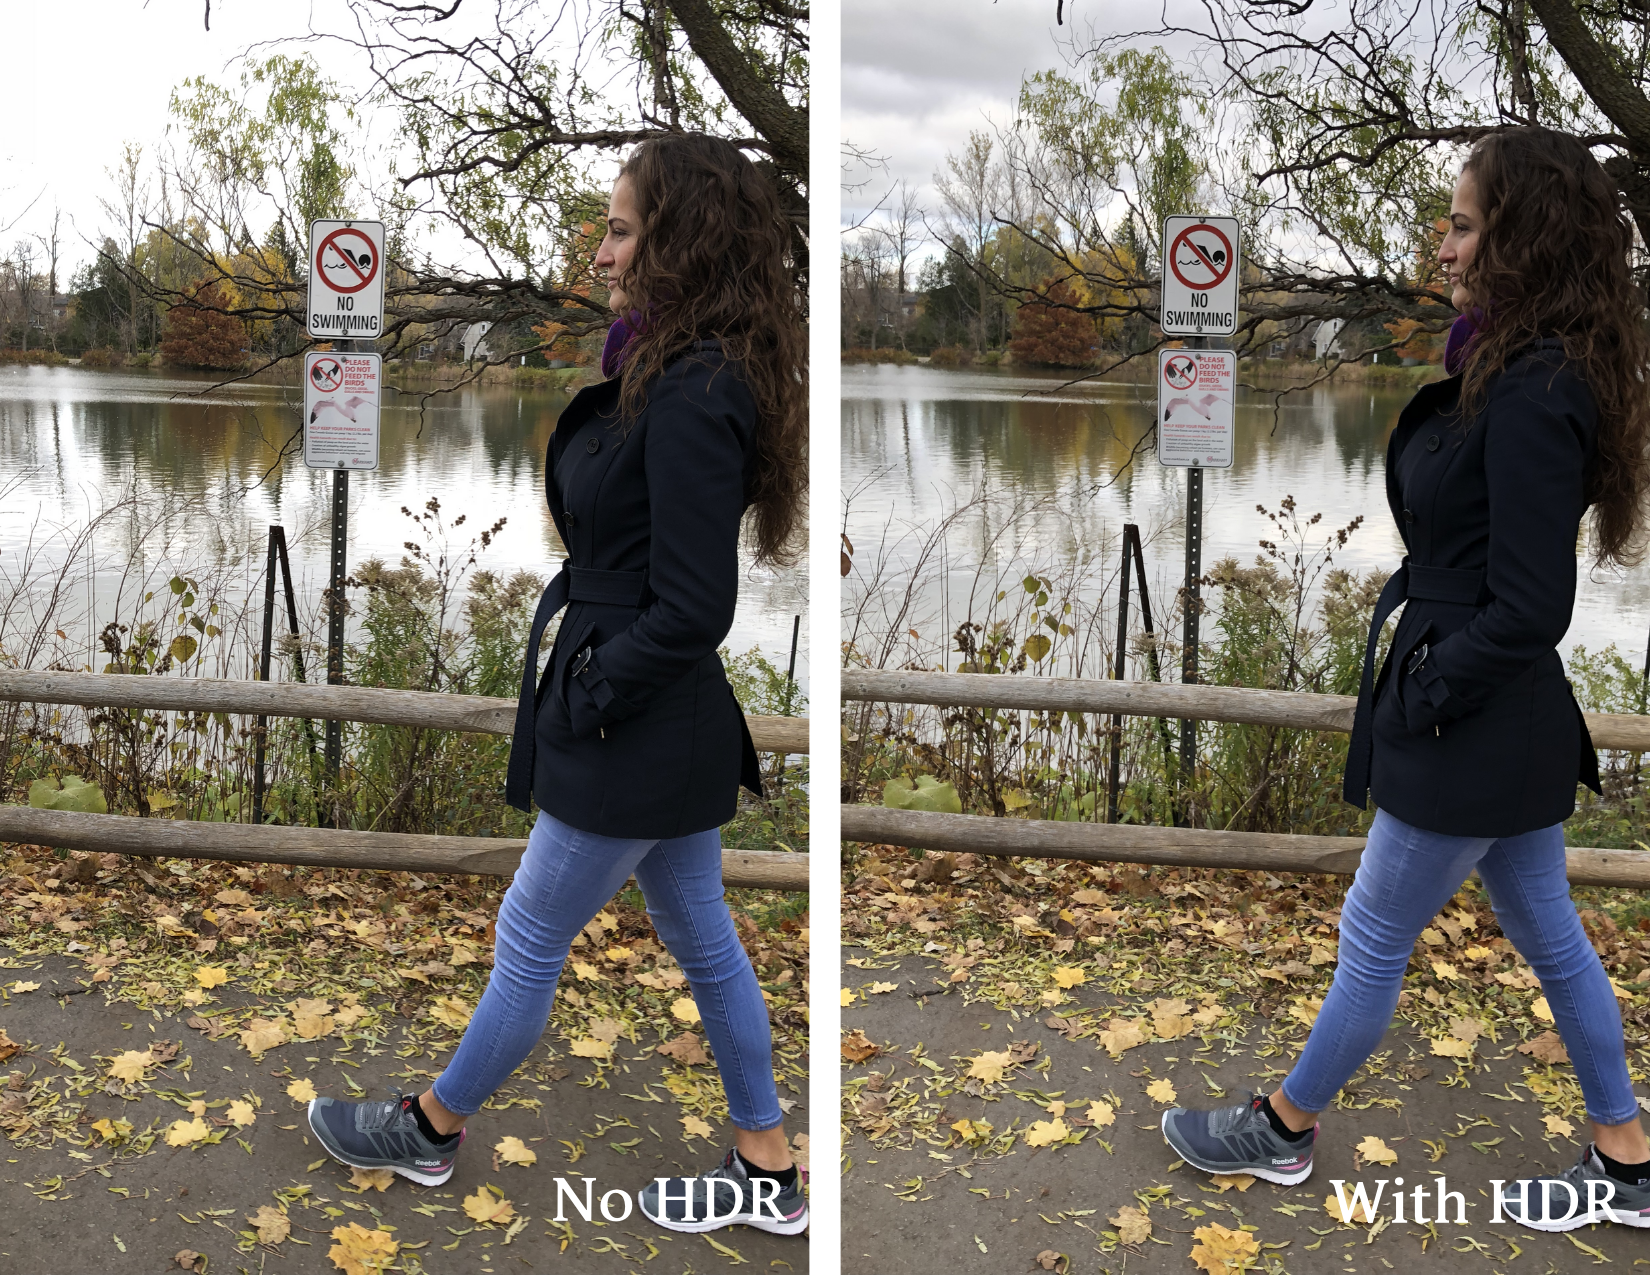
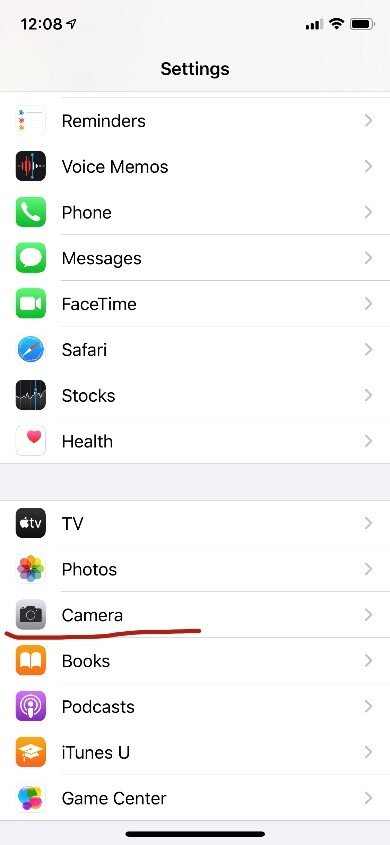
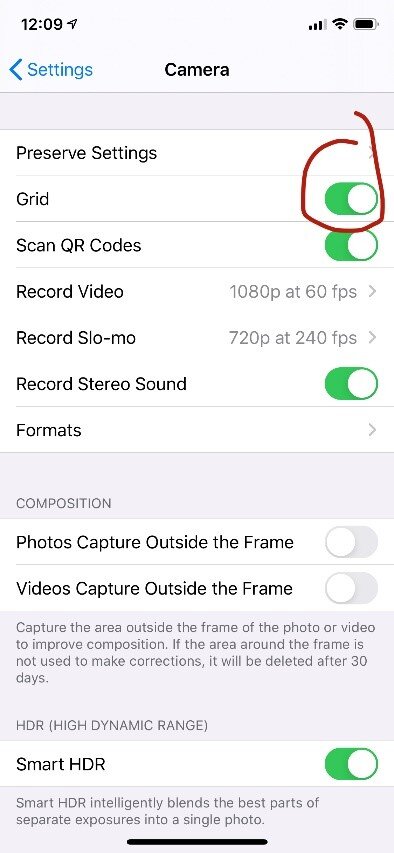
2) Turn on HDR
HDR stands for High Dynamic Range. This is good if you’re shooting a high contrast scene and you want to get better exposure. (Exposure means how bright or dark an image is.) Some people don’t like to use this but as a beginner you will want to turn this feature on. Once you take a photo, it will show up twice in your photo album. One will be darker than the other and will make the background or the lighter part of the photo more clear and the 2nd will make the darker part of the image brighter. You can turn this feature in your Camera Settings.
3) Lighting, Lighting, Lighting!
With an iPhone this is a little different then a DSLR. With a DSLR, golden hour is the best time to shoot, aka the hour before sunset. Depending on what version of iPhone you have, if you take photos during golden hour your photos will likely end up a bit blurry unless you’re shooting on a beach or somewhere where you can see the sun setting with no clouds.
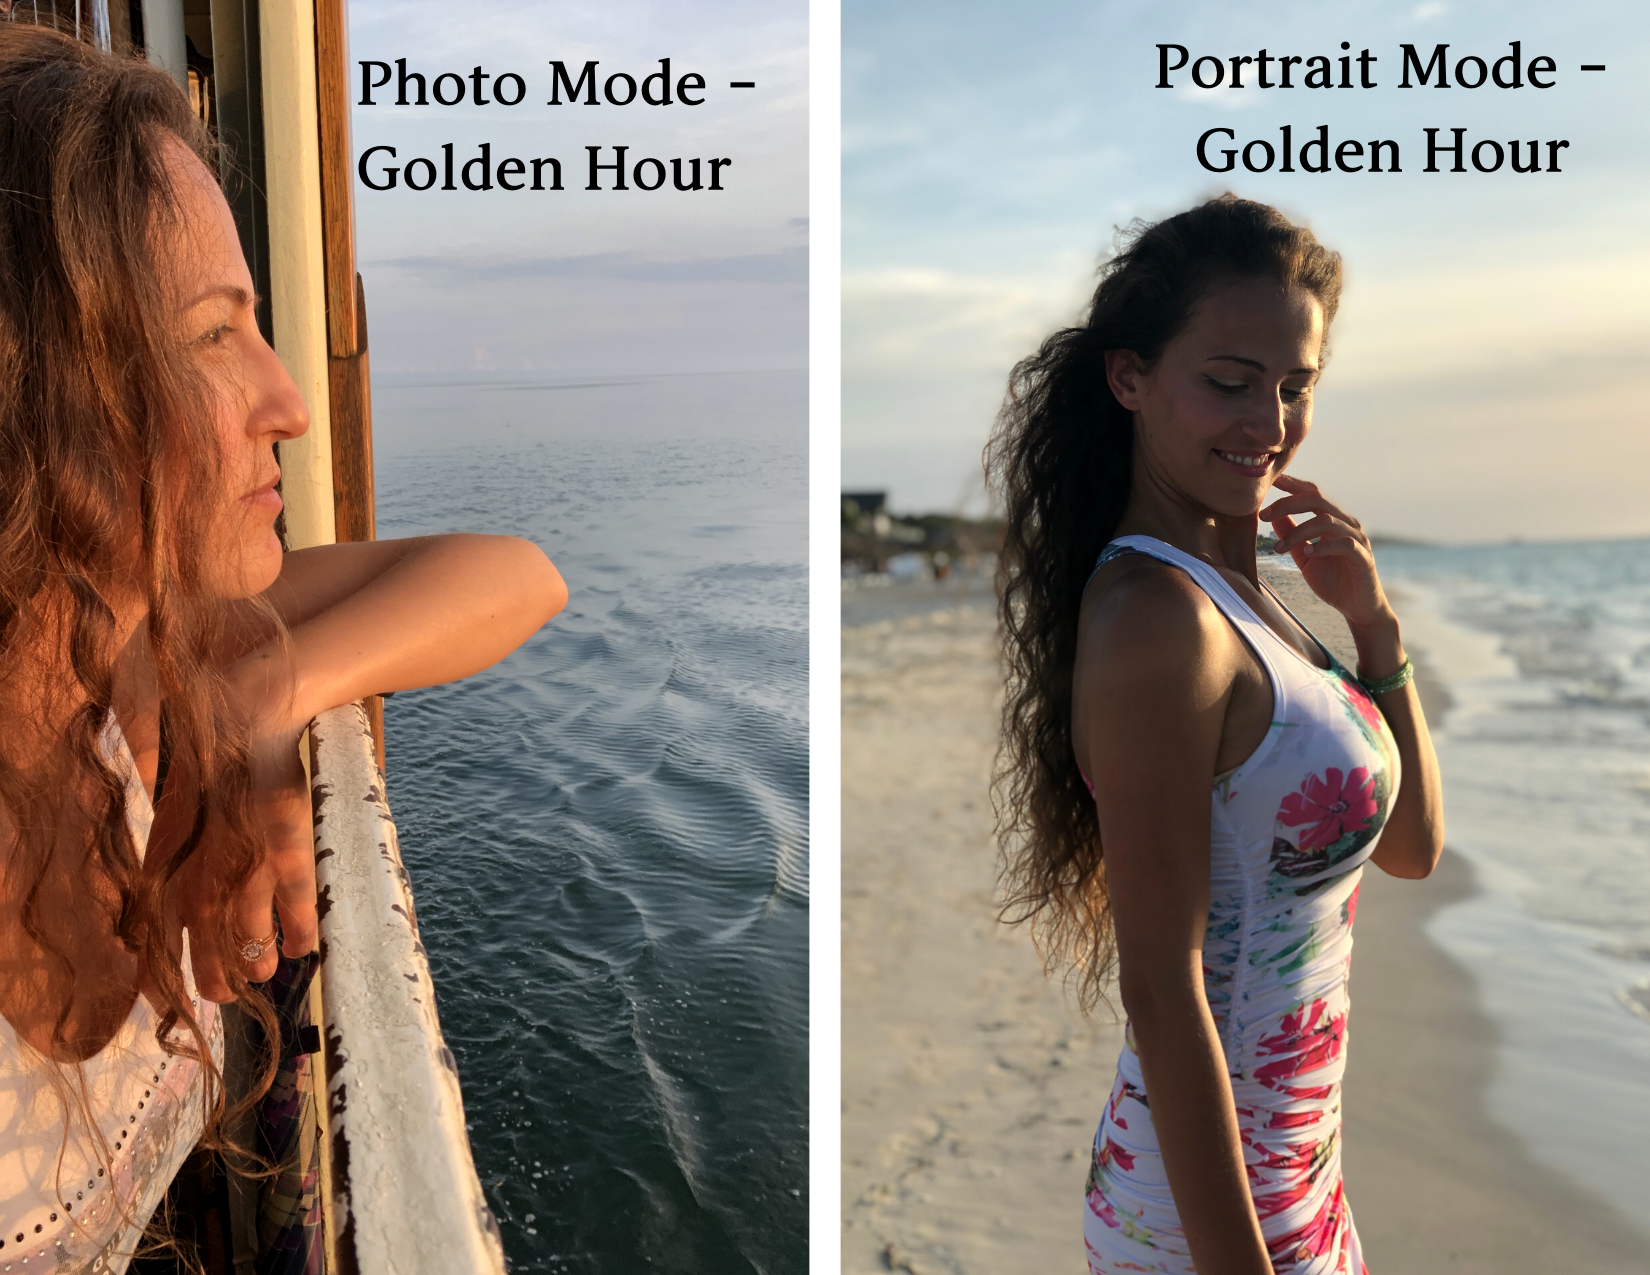
My suggestion is to take photos early in the morning after the sun has risen, all day during the day and maybe 2 hours before the sun sets latest because natural light is the best especially for travel photos.
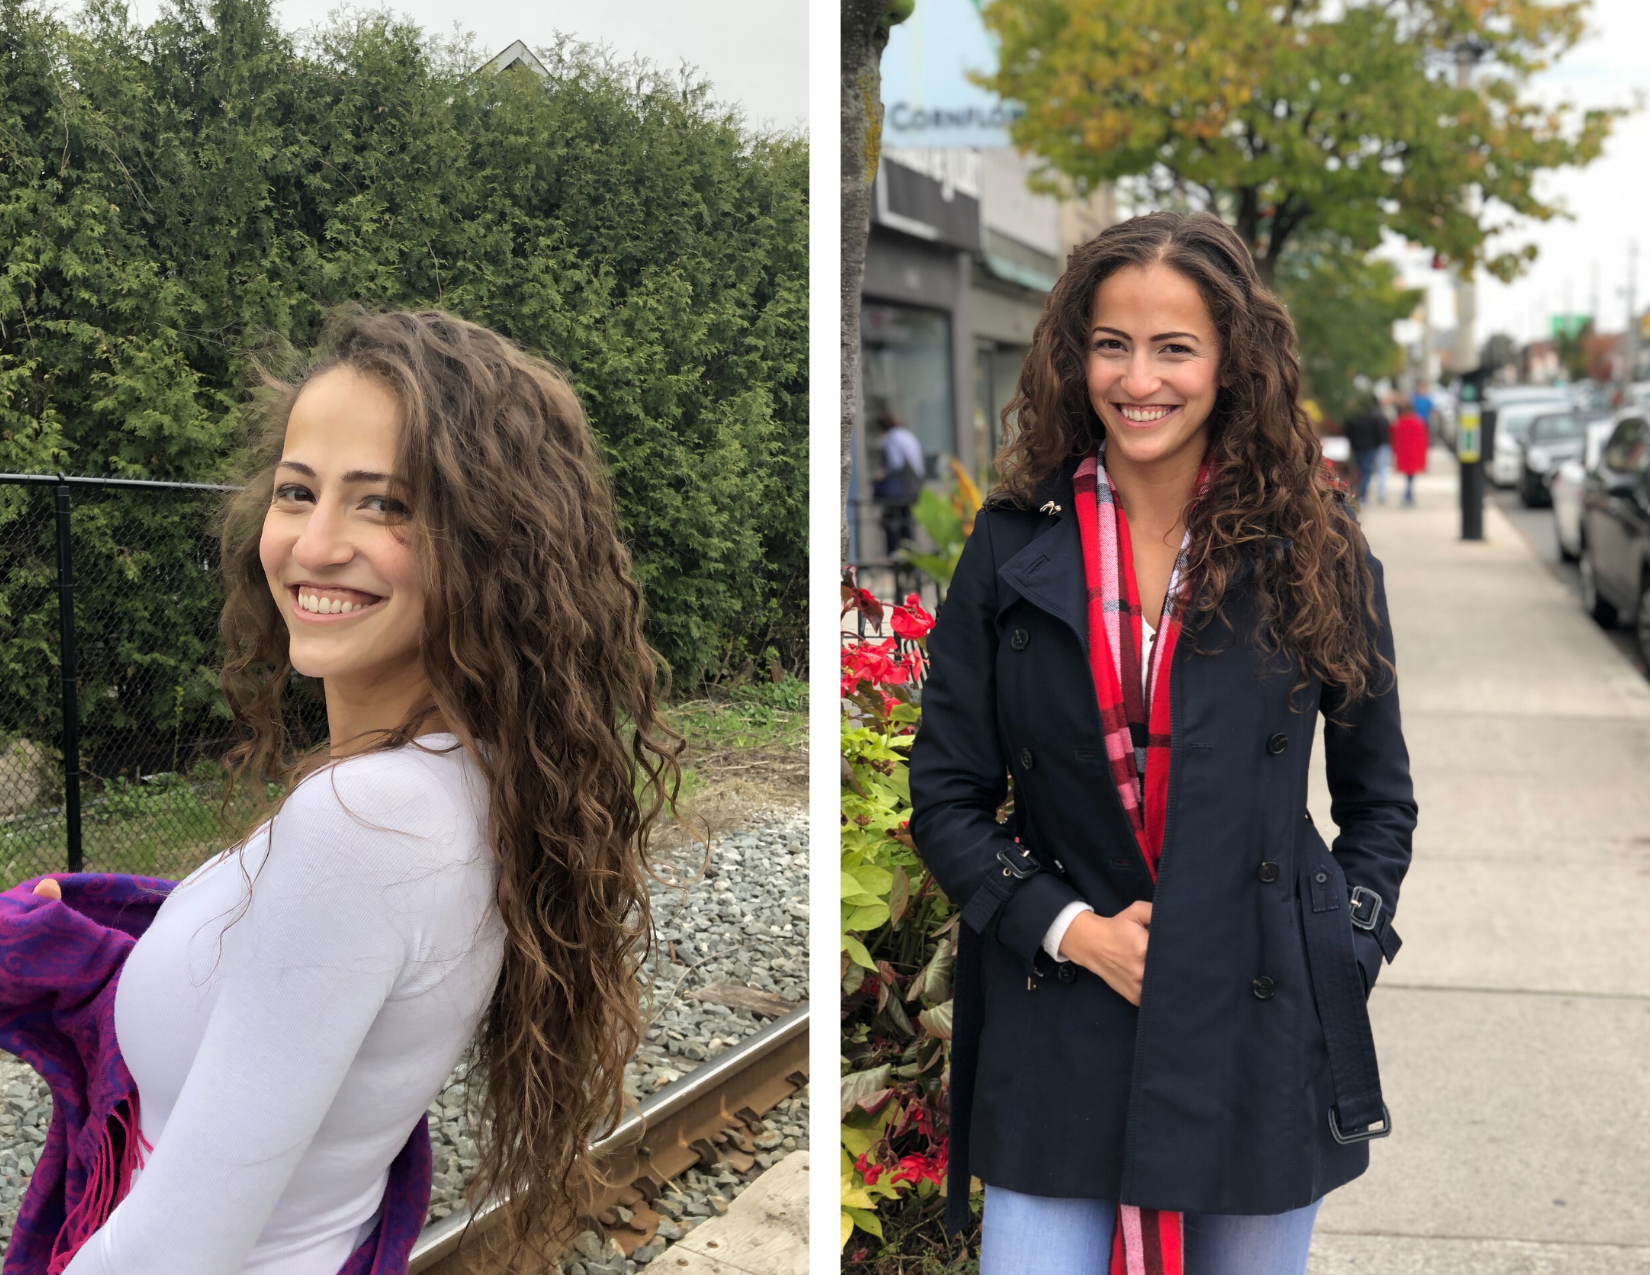
If you’re taking pictures of a person during the day on a sunny day, its better to do it in the shade to avoid weird shadows on the face (*make sure the person taking the photo is also in the shade). If for some reason you can’t do that, make that person turns their head towards the sun a bit, up or just turn to the right or left or take the photo from the back to make it more artistic.
I’ve done this to use the shadows to my advantage to make the photo more artistic.
Cloudy days are the best great for taking photos of a person because mid day the lighting is perfect and won’t create weird shadows.
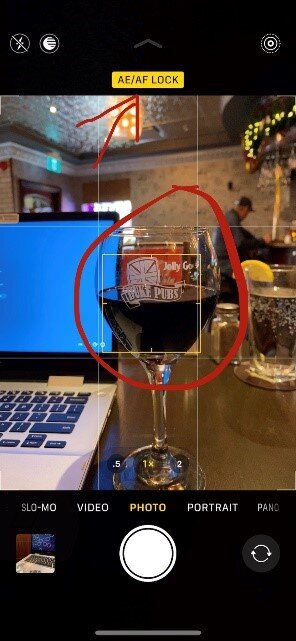
4) AE/AF Lock
When taking a photo, you can tap the screen once where you want to camera to focus. This is called manual focus because you're choosing where the focus is. If you tap & hold on the screen in one area, the camera will turn on AE/AF Lock (Auto Exposure & Auto Focus lock).
Tapping once to set focus works well in many situations, but sometimes this isn’t enough. For example, if something moves within the scene, the camera’s autofocus system might kick in, & the focus point & exposure level might automatically re-adjust. To ensure this doesn’t happen, you can use the AE/AF Lock feature to lock the focus & exposure. This effectively disables the autofocus system, allowing you control over focus & exposure.
Once you’ve locked focus, you shouldn’t change the distance between your camera & the subject. If you do move forwards or back, the camera will end up focusing on the wrong place. If you think you’re going to want to take more than one picture of the same scene, use AE/AF Lock to save you from having to set focus & exposure for each separate shot. When you activate AE/AF lock, the camera keeps focus & exposure locked even after you press the shutter button.
5) Rule of Thirds
Go to your camera settings and turn on the grid feature. This will turn on a grid on your camera to divide the screen into 3 horizontal and 3 vertical sections. Using the rule of thirds allows you to more easily frame the subject in an interesting way. You can frame the subject where the horizontal and vertical lines intersect.
When starting out, always use the grid feature until you become more proficient. It’s also good to have it on in case you ask someone else to take your photo, because it will help you direct them on how you want that photo taken.
6) Composition
This refers to what is in your photo and how its arranged to draw a viewer’s eye to the most important part – how and what is your photo composed of to make it interesting. It means paying attention to what will be photographed, how it is placed in relationship to other objects in the image, and how well the subject matter is expressed.
Keep it simple - an overly cluttered shot with chaotic backgrounds can distract the eye. If you have no choice you can always shoot in portrait mode to blur the background.

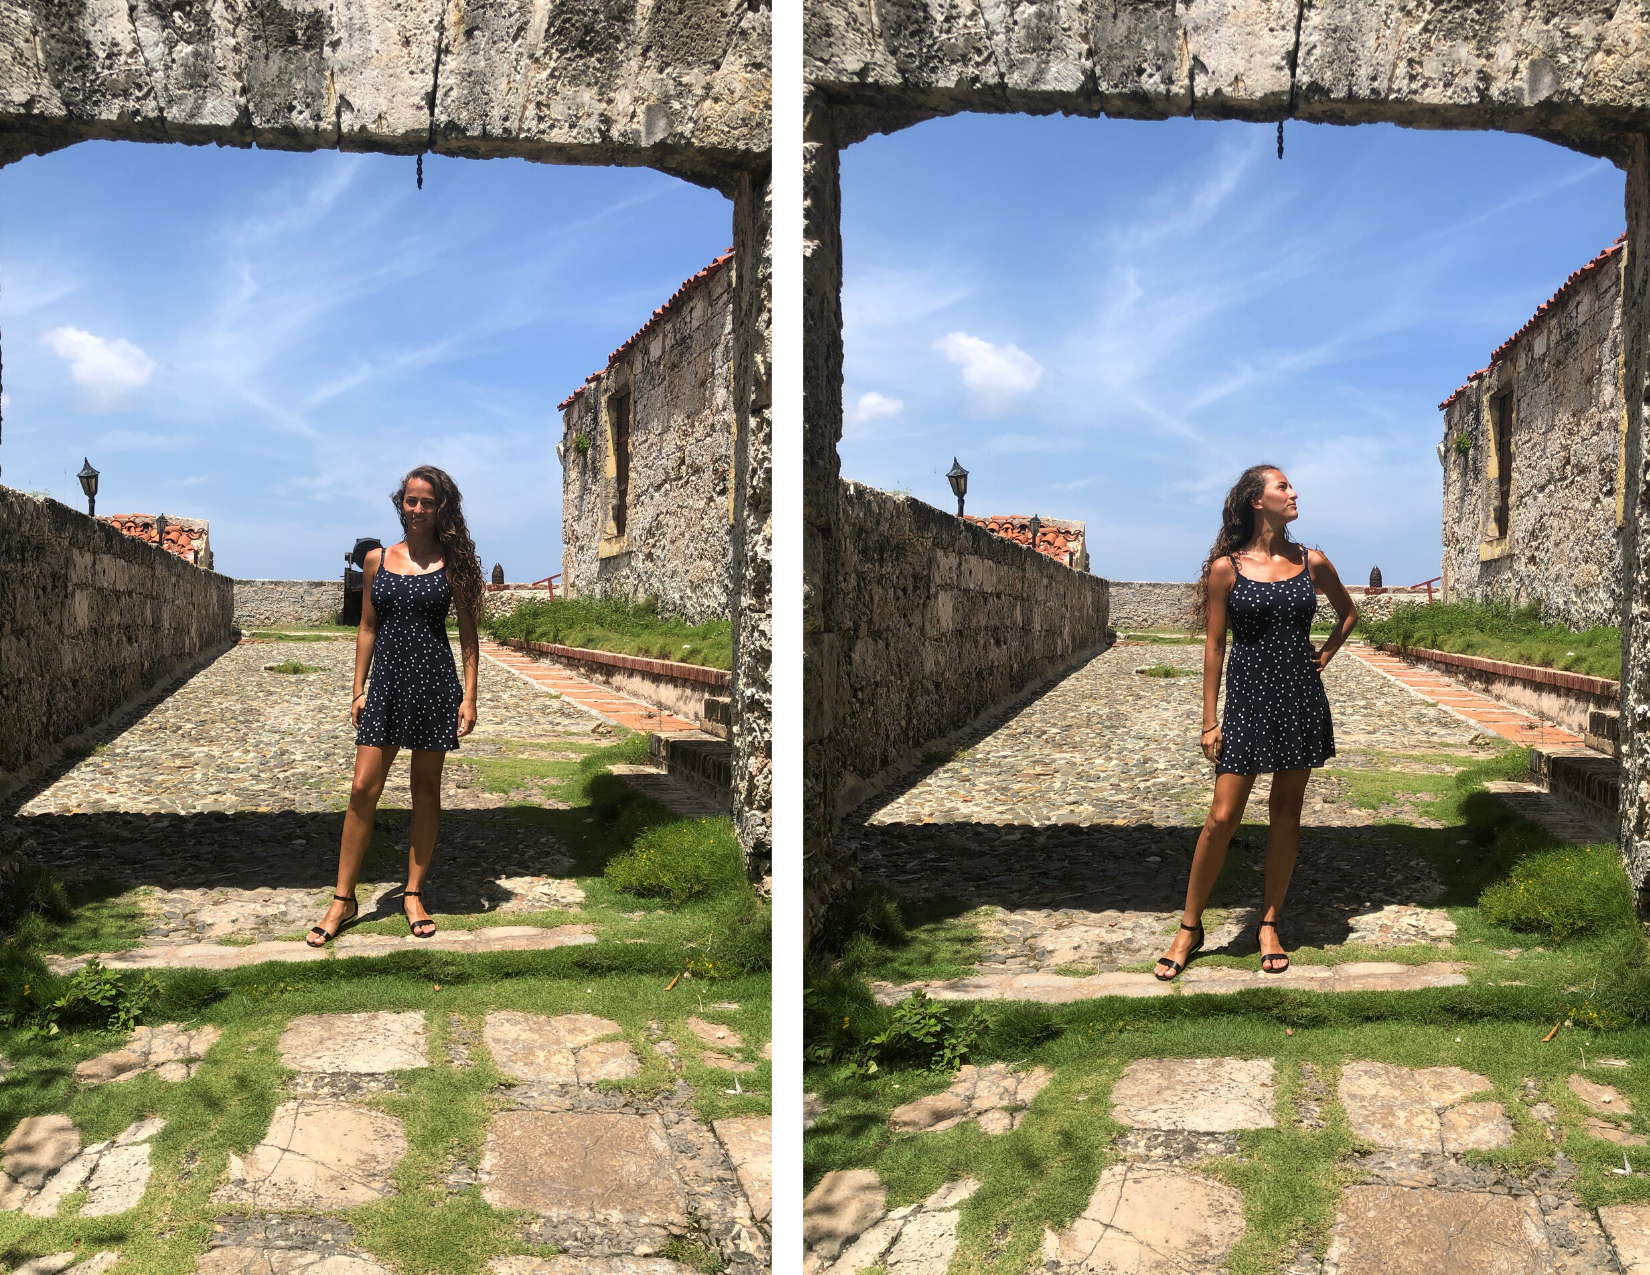
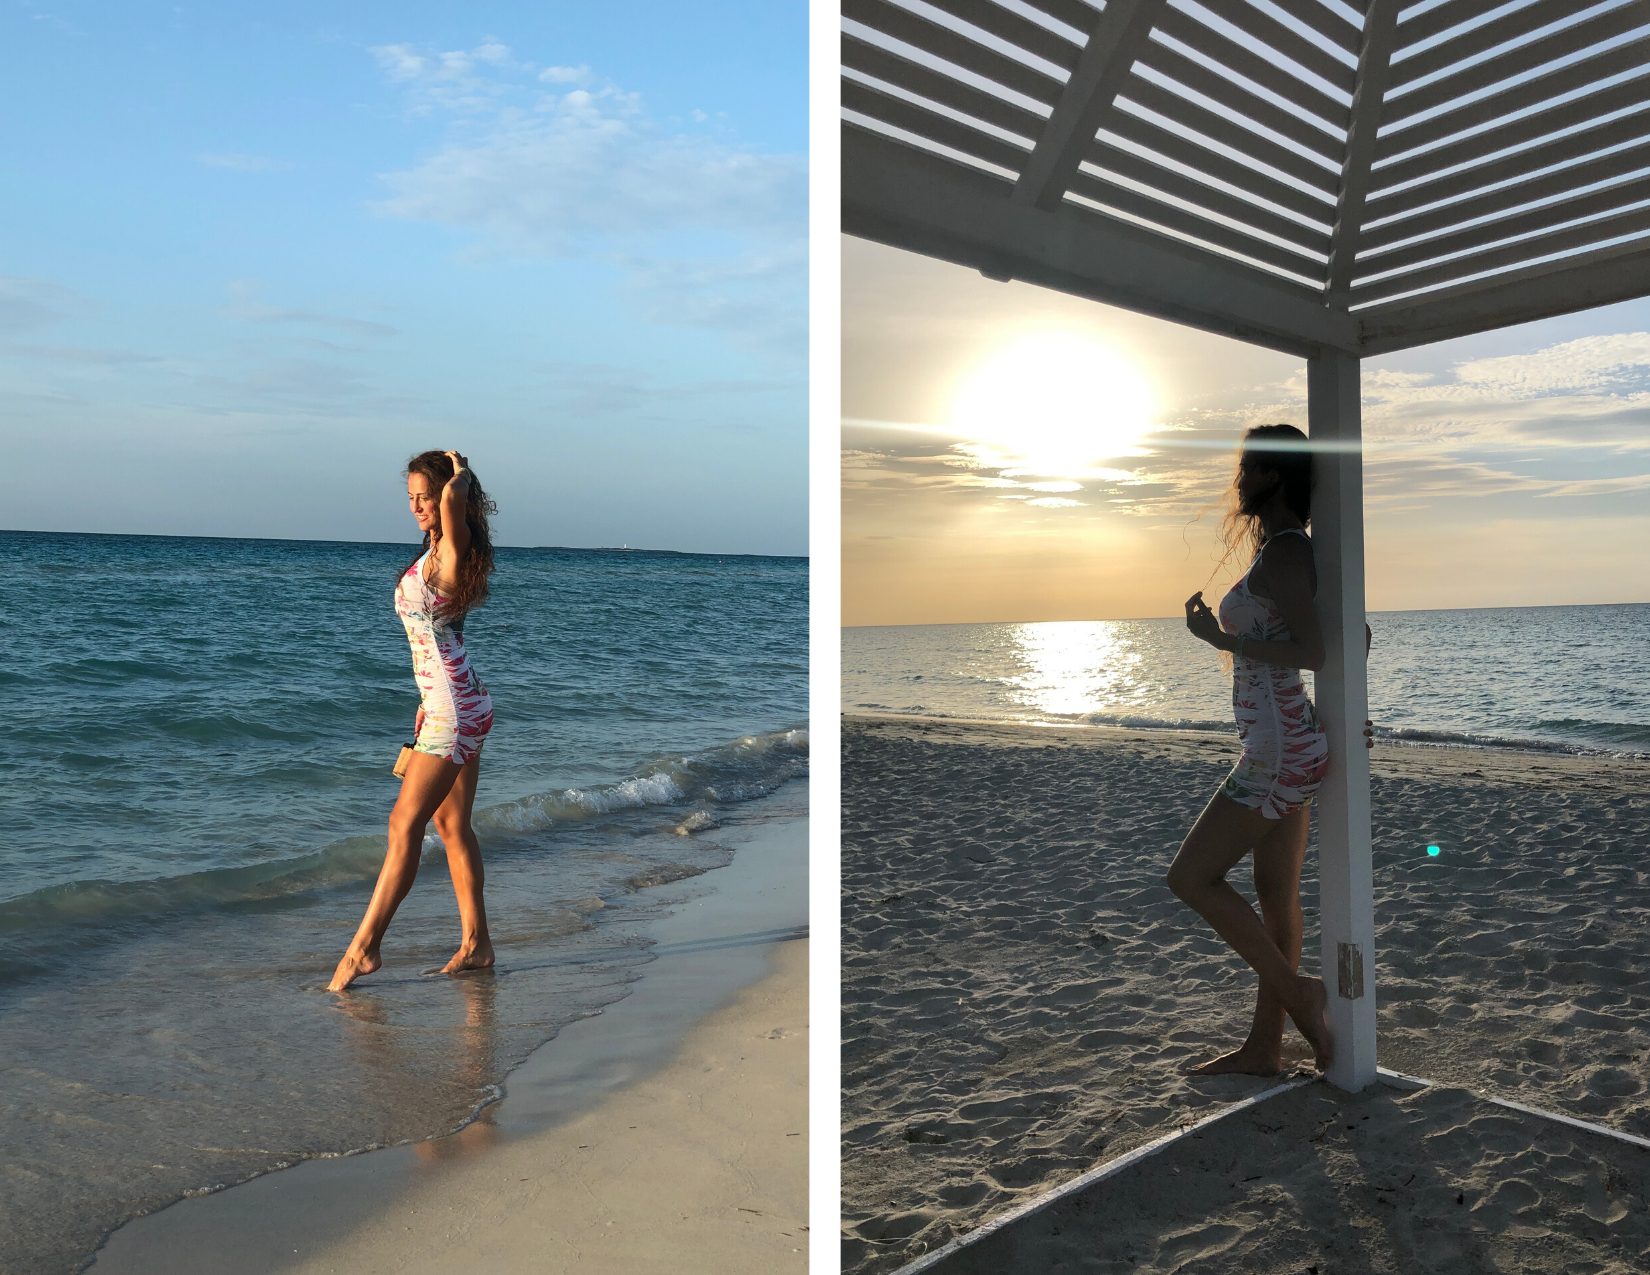
7) Angles
The most common is for us to take the photo straight the way your eyes see it. This is definitely fine, but try to change up the angle to make the photo more interesting. Play around with the angles and see what looks good.
But be careful because if you take a photo of a person too high looking down on them, it makes their head look too large or if you take it too low looking up, their legs may look too long and disproportionate. Also, anything closer to the camera will look larger.
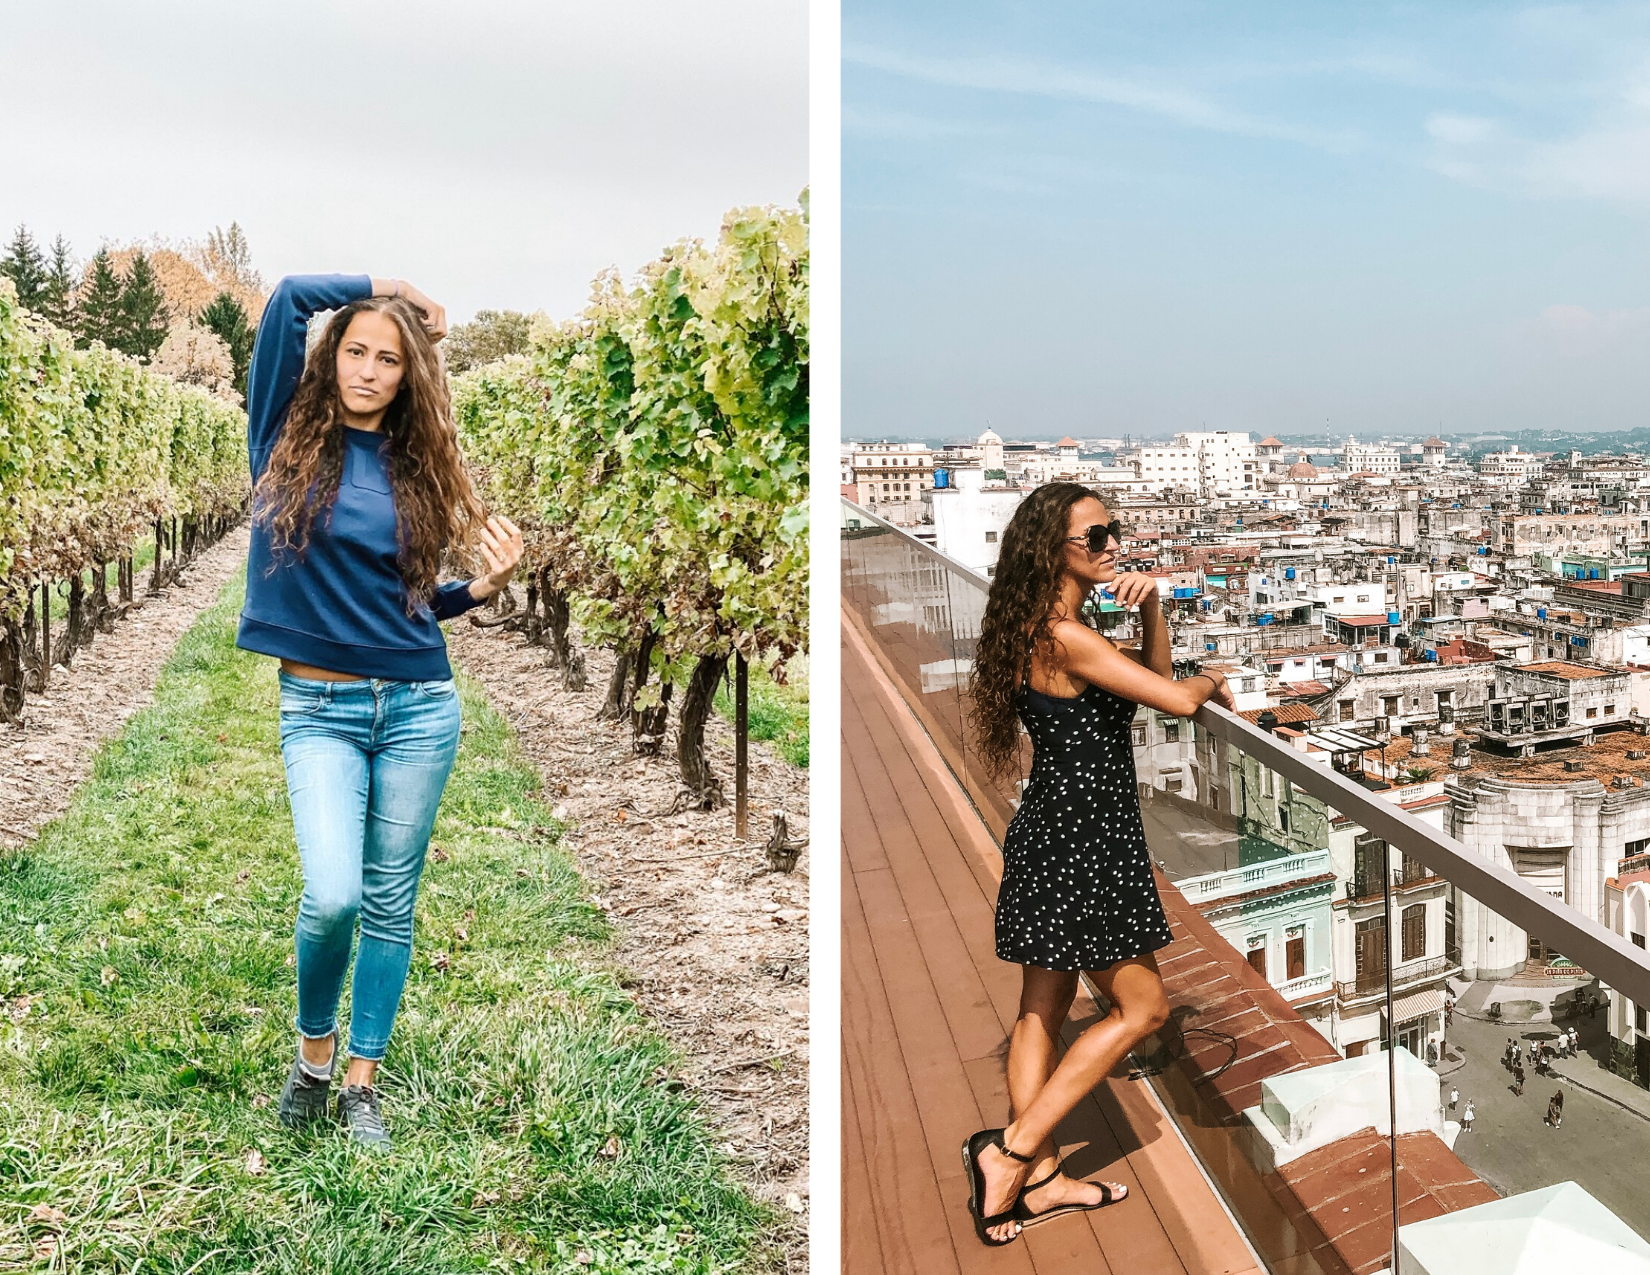
In the photo on the right below, the camera angle is slightly lower looking up at me so it makes me look taller and makes my legs look longer.

8) Take lots of photos
You can’t just take 5 photos because likely you won’t like any of them. To get that 1 perfect photo you must take at least 20-30 photos. When I was modeling, that’s when I learned this. When my fiancé takes my photos for Instagram he takes about a hundred per look. And we usually do a few different looks.

9) To zoom or not to zoom?
Don’t use zoom if you’re taking a photo of a person. It will almost always be blurry and grainy that even when you edit it, it won’t help. Just get closer to your subject.
If you’re taking landscape travel photos, then a little zoom is ok but don’t zoom too much!
10) Lines
The viewers eyes are naturally drawn along lines in a photograph. Using lines in a photo will draw in the viewers eye to where you want them to focus on and will make a photo more interesting. If you want to draw attention to a certain part of the frame, look for lines which already exist & then use them to your advantage. You can use lines & naturally existing frames to frame your subject in the photo.
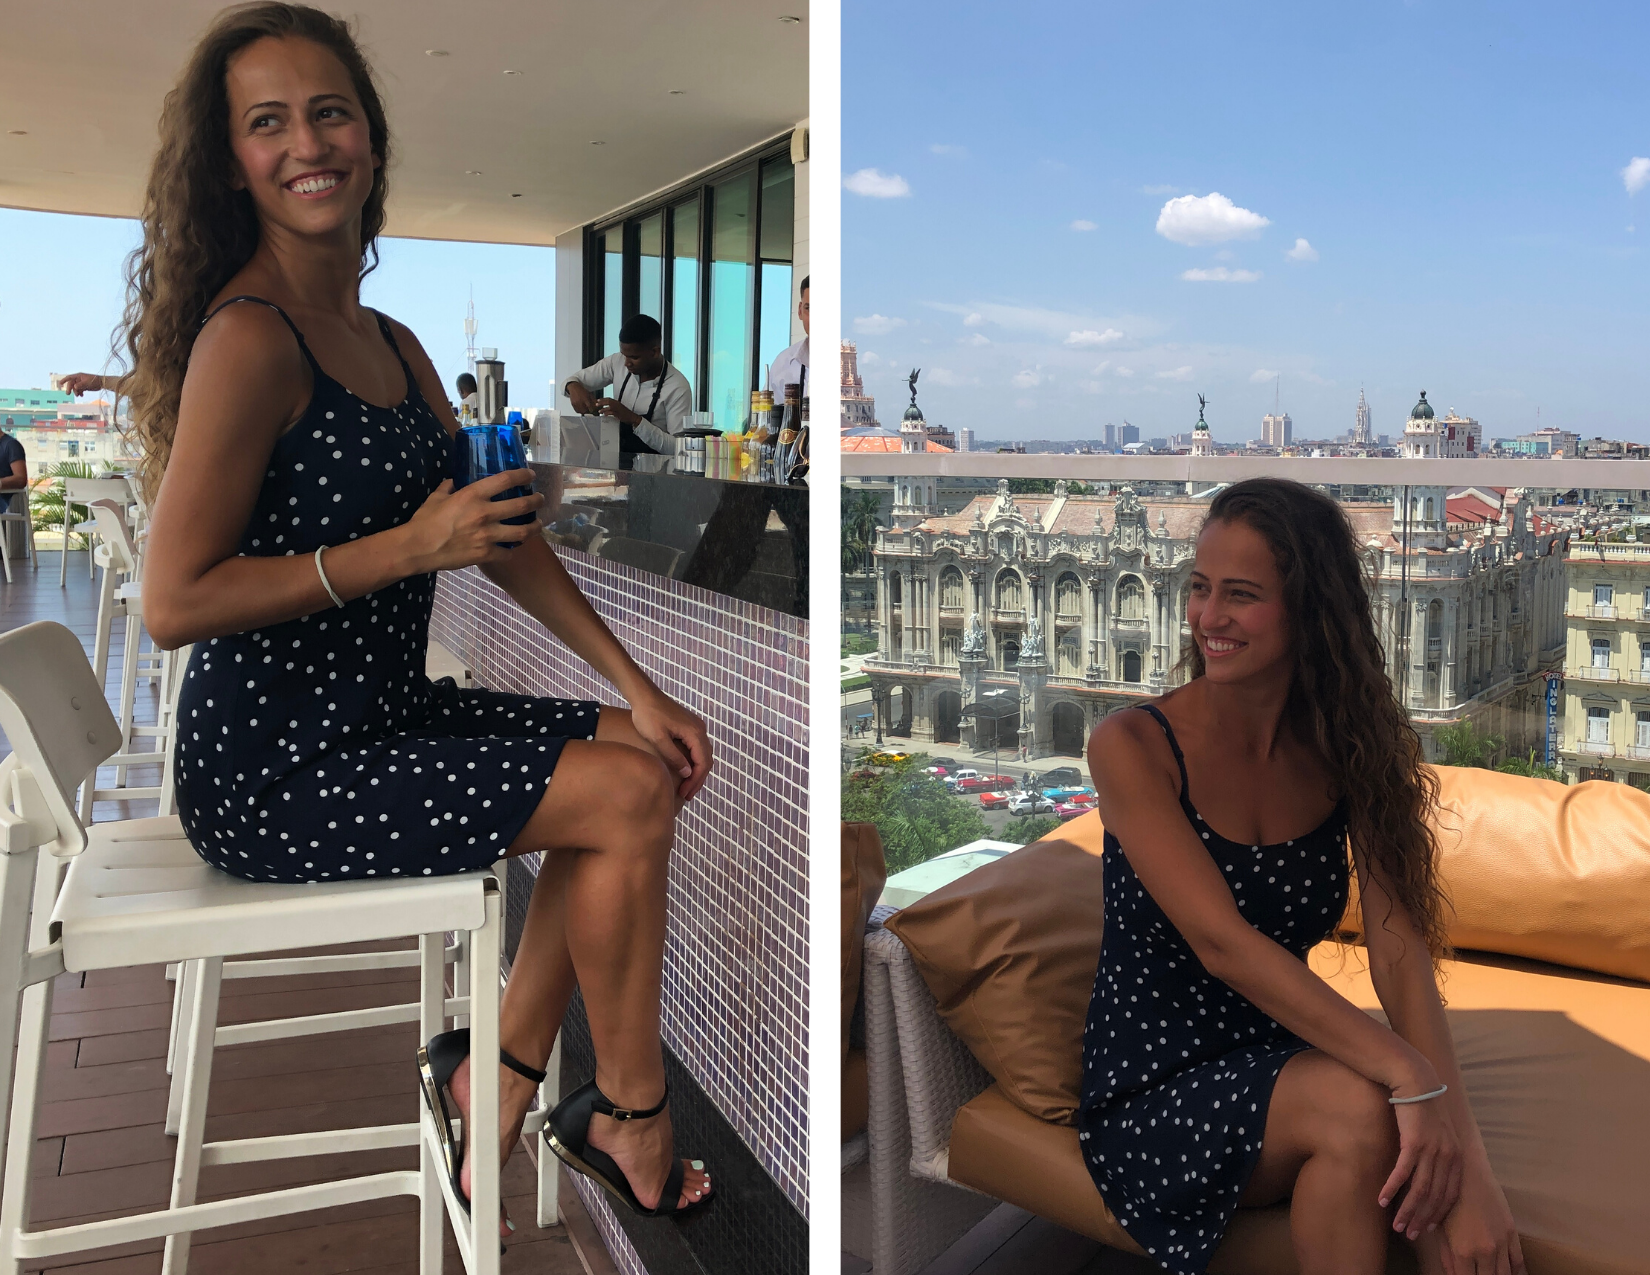
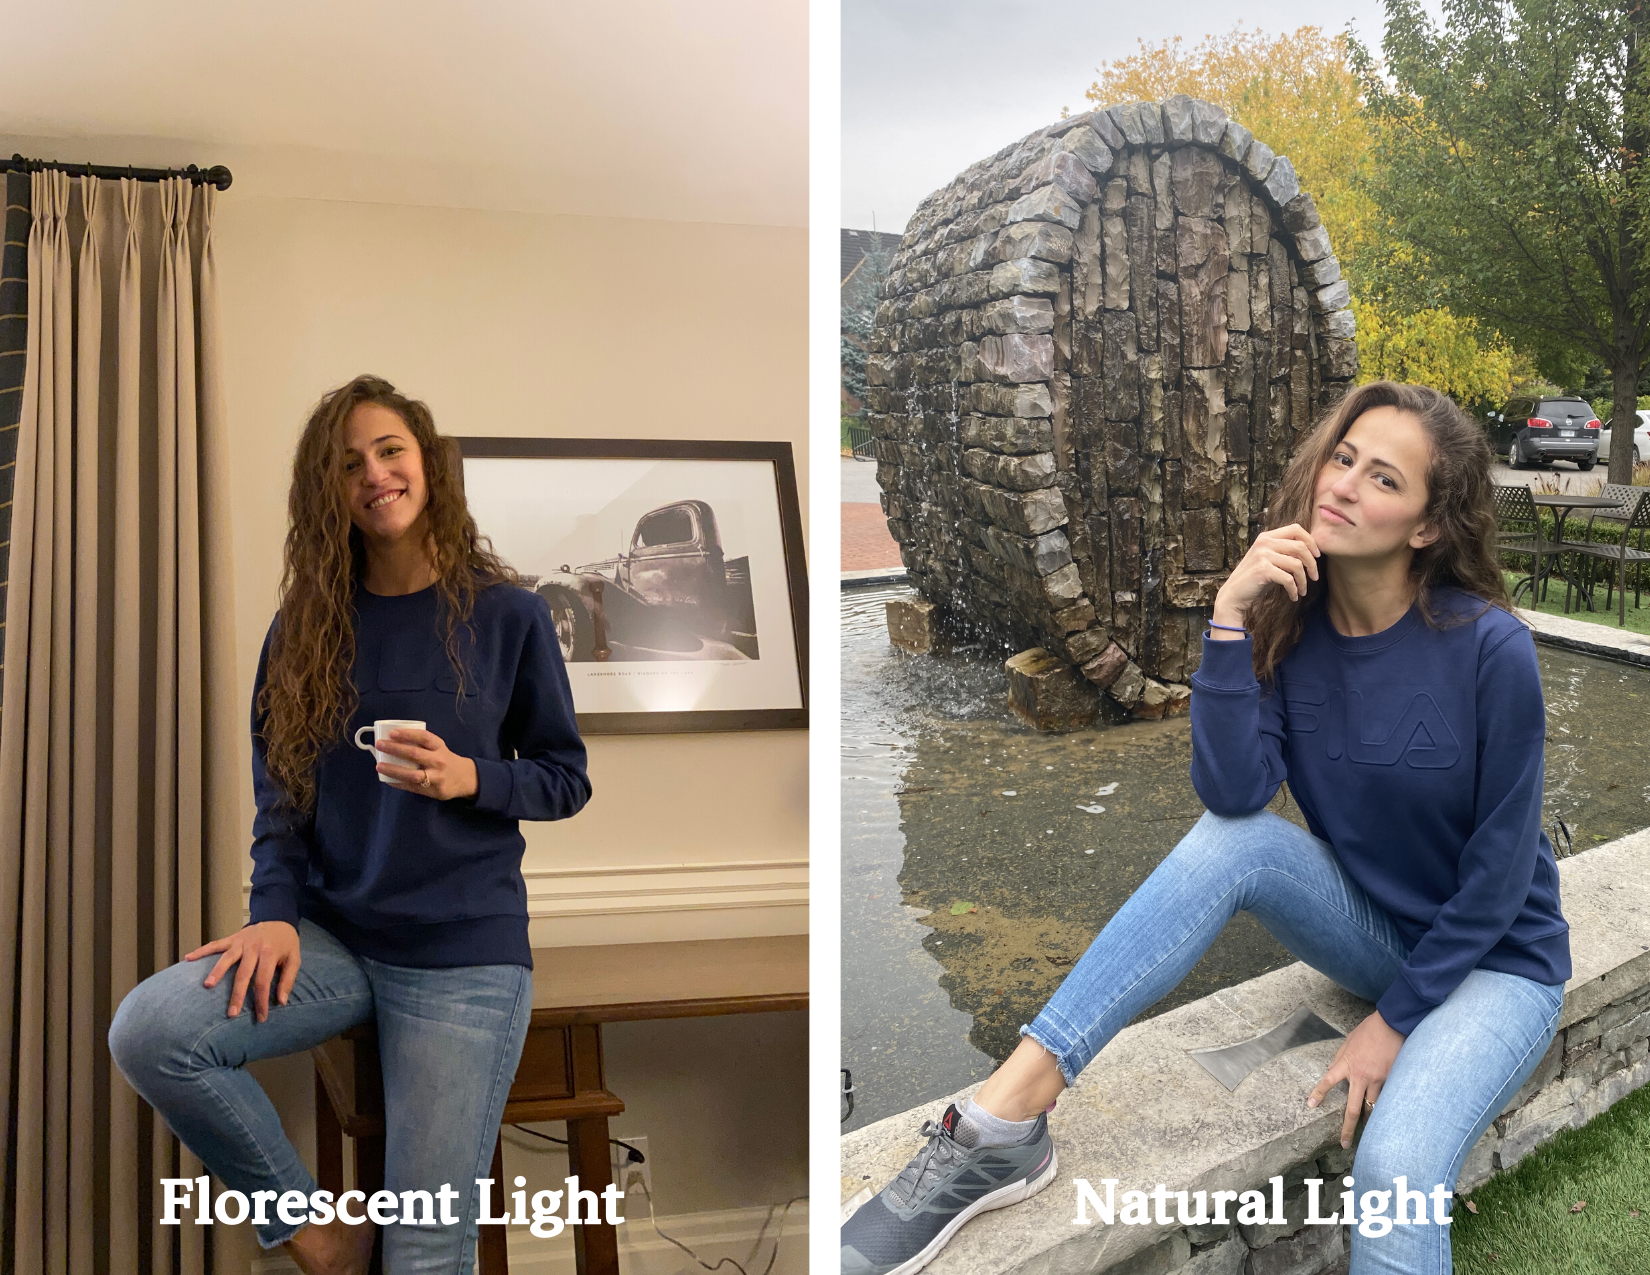
11) Natural Light vs Fluorescent Light
You can take great photos with each but they are different. Natural light is my favourite which is the light from the sun. Fluorescent light is good too but when you’re taking photos with it indoors make sure there is enough light hitting your subject (you).
If possible, move the lighting sources around and see what looks good or if you can’t move the lights then move yourself around to find the perfect spot with the best lighting.
12) Camera Modes
There are 2 main modes I use – regular photo & portrait mode. If you’re doing head shots, portrait mode is great for that because it looks like you used a DSLR. It creates a bokeh effect which means the subject is in focus and the background is blurred.
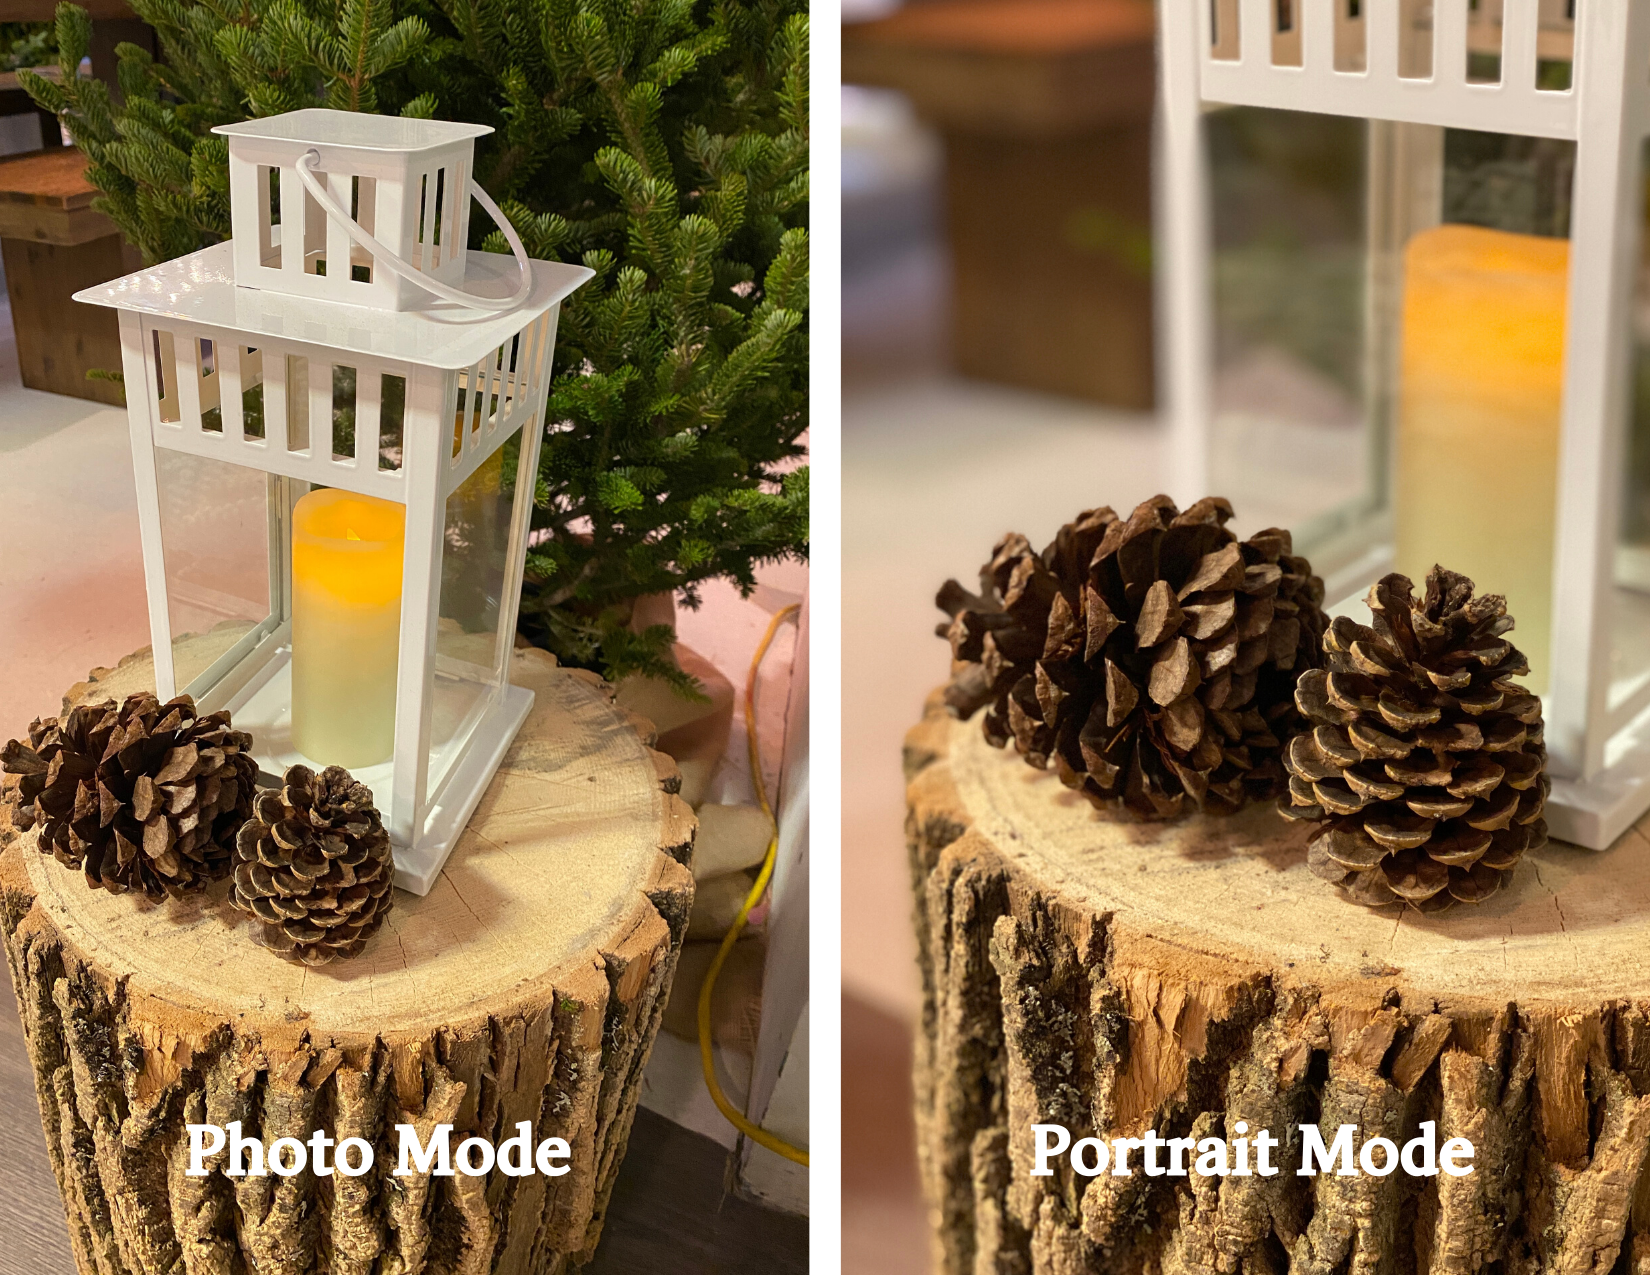
If the sun is setting or there isn’t enough lighting, you will notice when using portrait mode the photo is too dark and/or the subject is blurry even though your focus is fine.
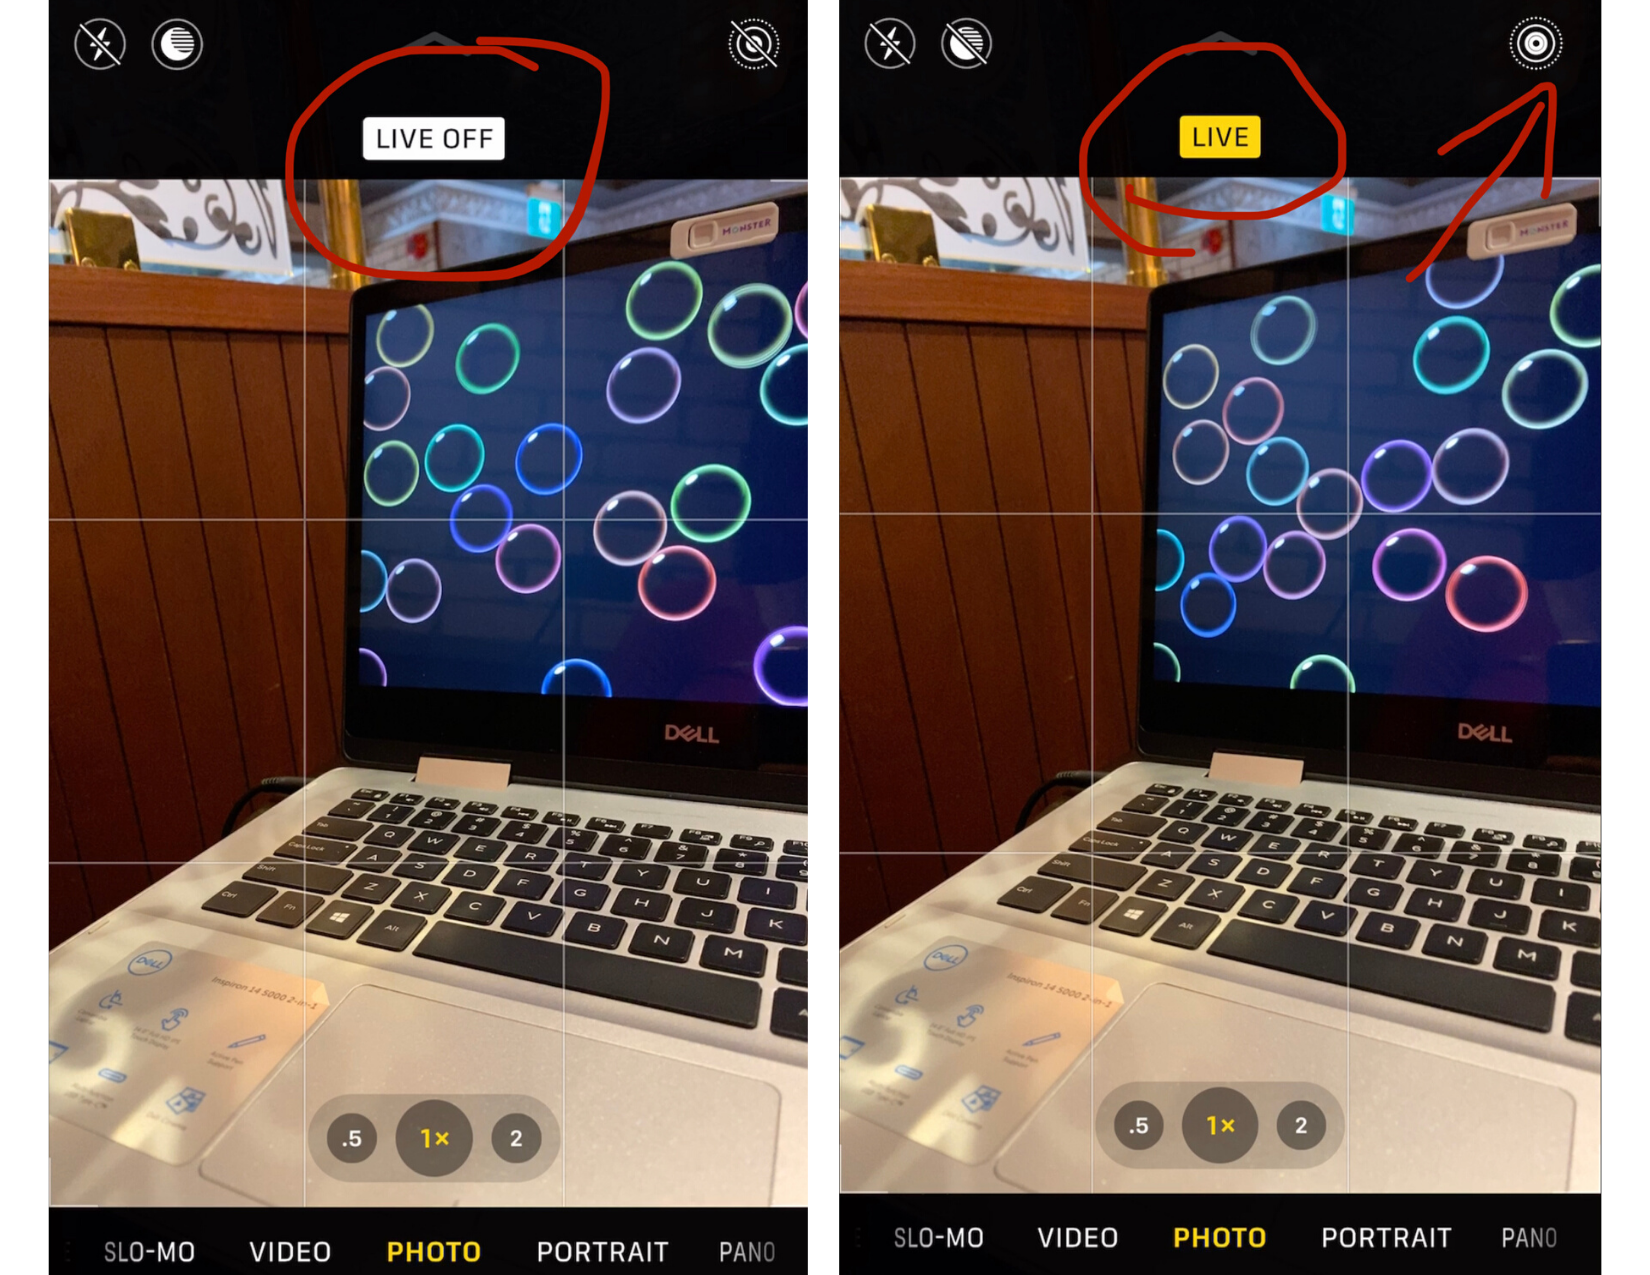
13) Live Photo
With iPhone you can turn on the live feature. It will take a short video on every shot and auto select the best sharpest moment in your photo as the main photo. This is great for action shots where your subject is moving because if you don’t use live photo you’ll get tons of blurry photos and no good ones you can use.
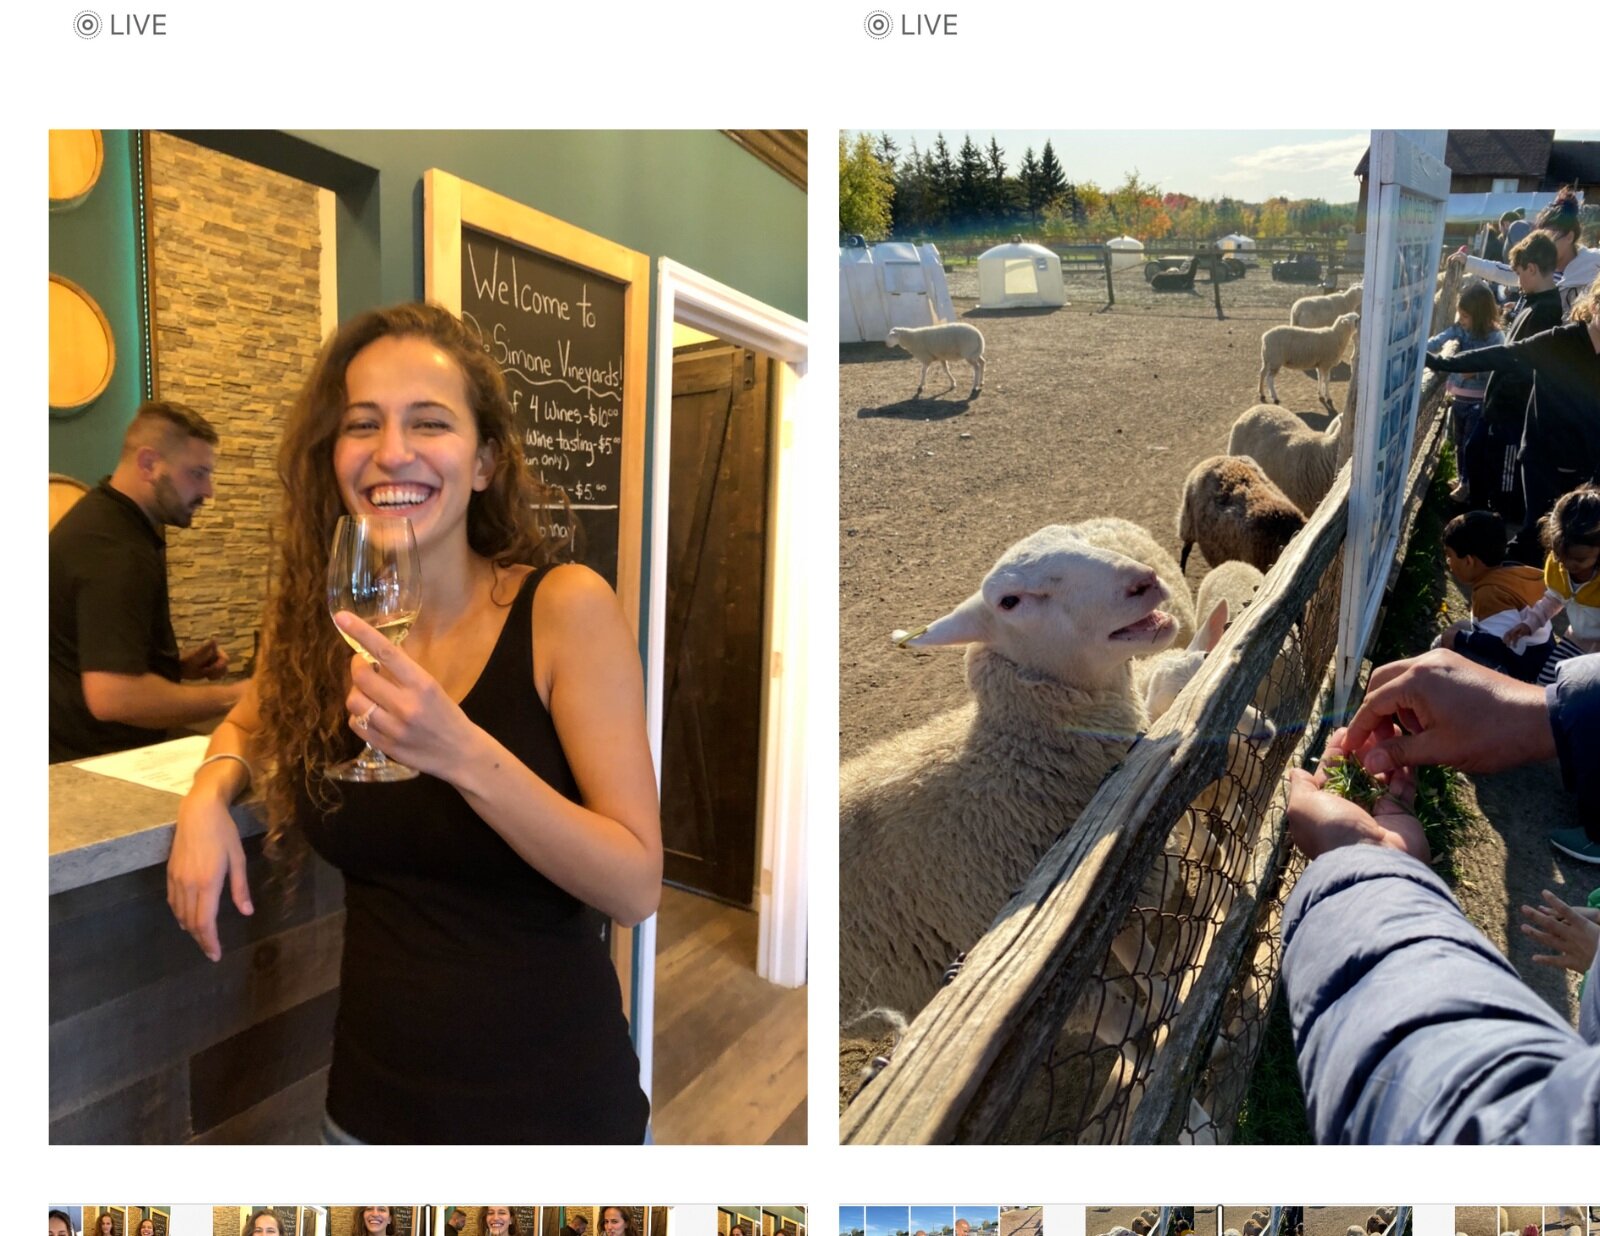
You can also edit the photo and select another shot that you may like better.
14) Don’t forget to edit
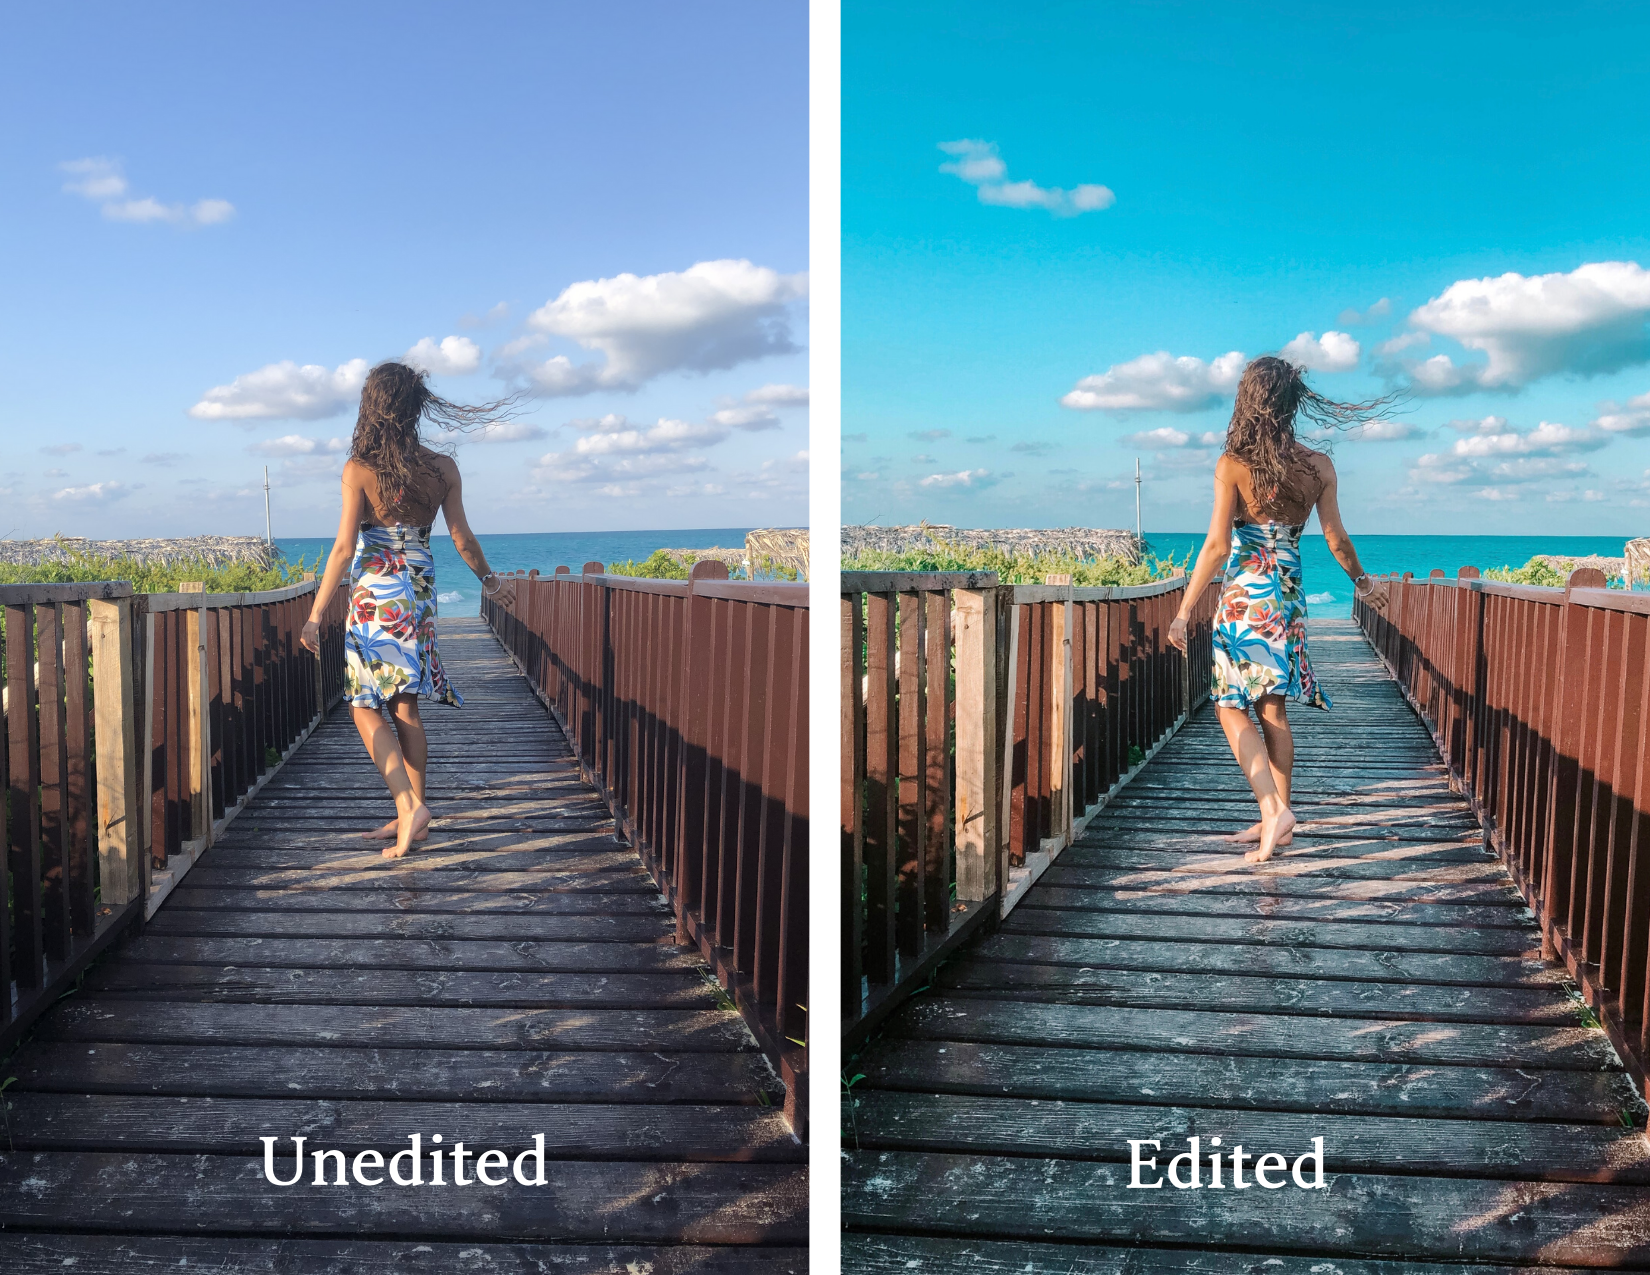
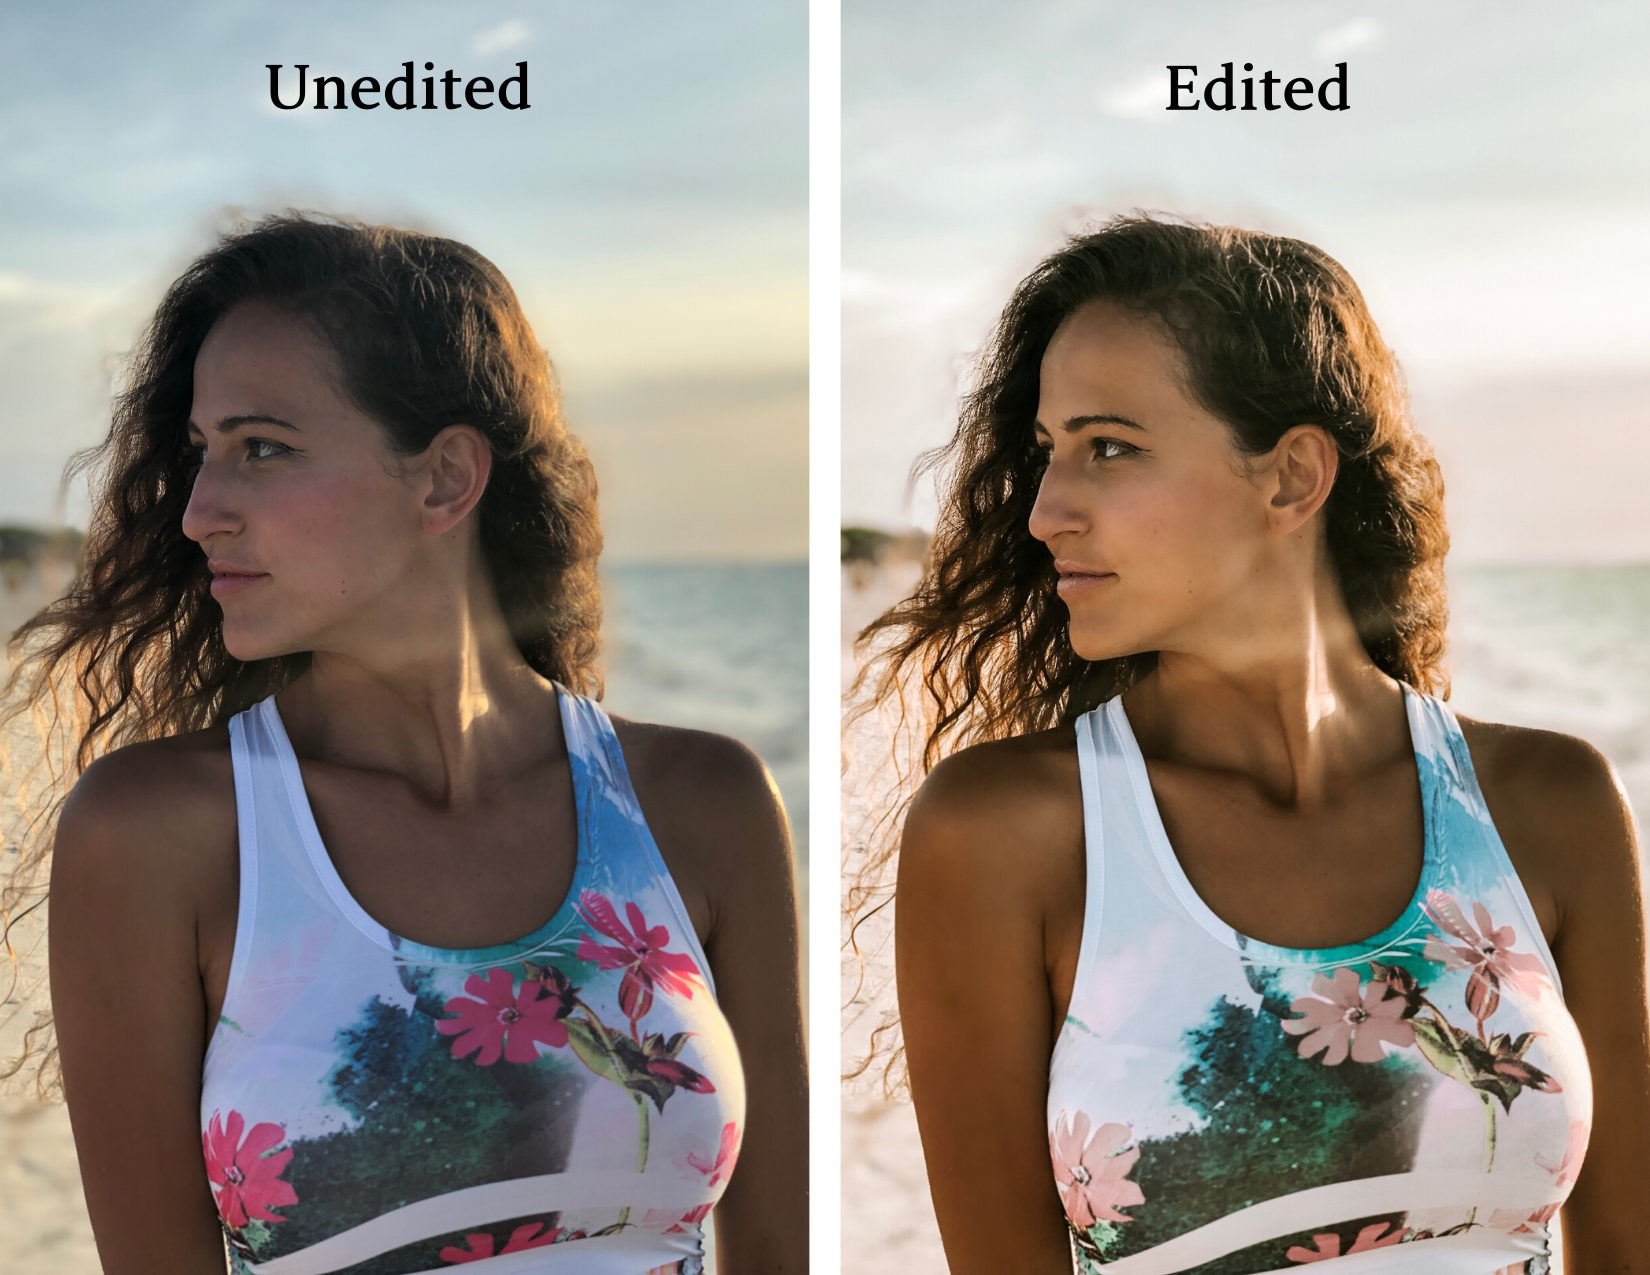
Editing your photo is such an important part most people overlook. All pros do this even if it’s a few things but not doing any edits to a photo is like not putting icing on the cake.
Yes, overly edited photos look really bad but so do unedited photos. You will likely be using these photos for your Social Media or website. Instagram especially is such a visual app and the photo will stop the scroll, then a person will read the caption.
Your photos need to stop the scroll that’s why editing is important.
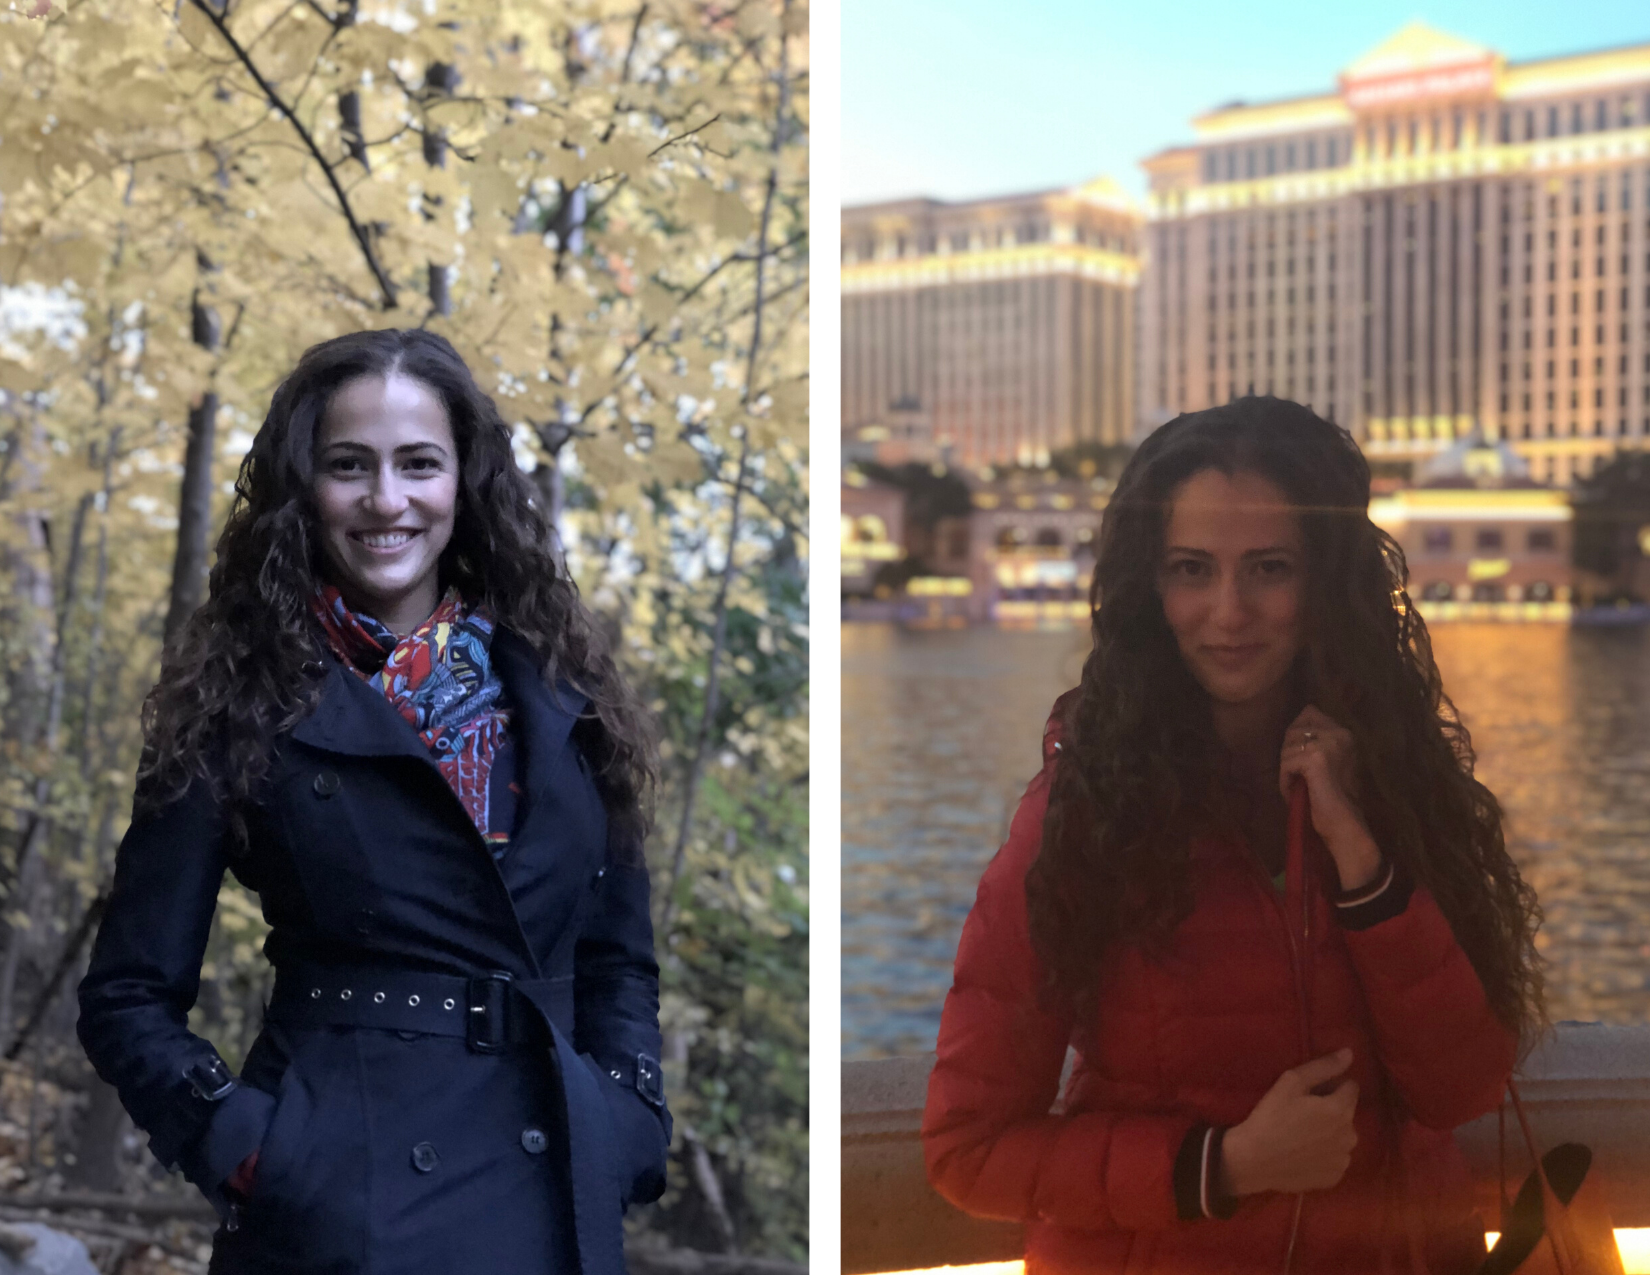
Bonus Tip: Location of Light
When planning to take a photo, first figure out where the light source is coming from & place your subject accordingly. Make sure the light is not behind your subject, unless that’s the look you’re going for, otherwise it creates a silhouette where your subject is too dark and its very hard to edit it after. In some cases, this is a nice effect if that's what you're going for but if you want to see your subject make sure the light is not behind them. Always be strategic when taking a photo.
I will write a separate blog post on everything you need to know about editing a photo on your iPhone, so be sure to subscribe to my newsletter and you will be notified of new blog posts, specials, promos and you will receive a FREE PHOTOGRAPHY CHEATSHEET!
Were these tips helpful? Did you learn something? Do you have any questions about these tips? Send me a DM on Instagram or leave a comment and let me know.
If you use my tips in your photos, please tag them #asyaphototips so I can see your work and I can give you a shout out in my IG stories!
PS: Want to know how to take better night photos on your iPhone? Check out my YouTube video with all those tips!
Pin This Post For Later!